The QClients program is designed to record the work done and store diagnostic information obtained from the ScanDoc programs. Using the QClients program, you can save and view data in the client database. You can also generate a report and print it or save it to your computer. The data is entered manually or read from the ScanDoc program.
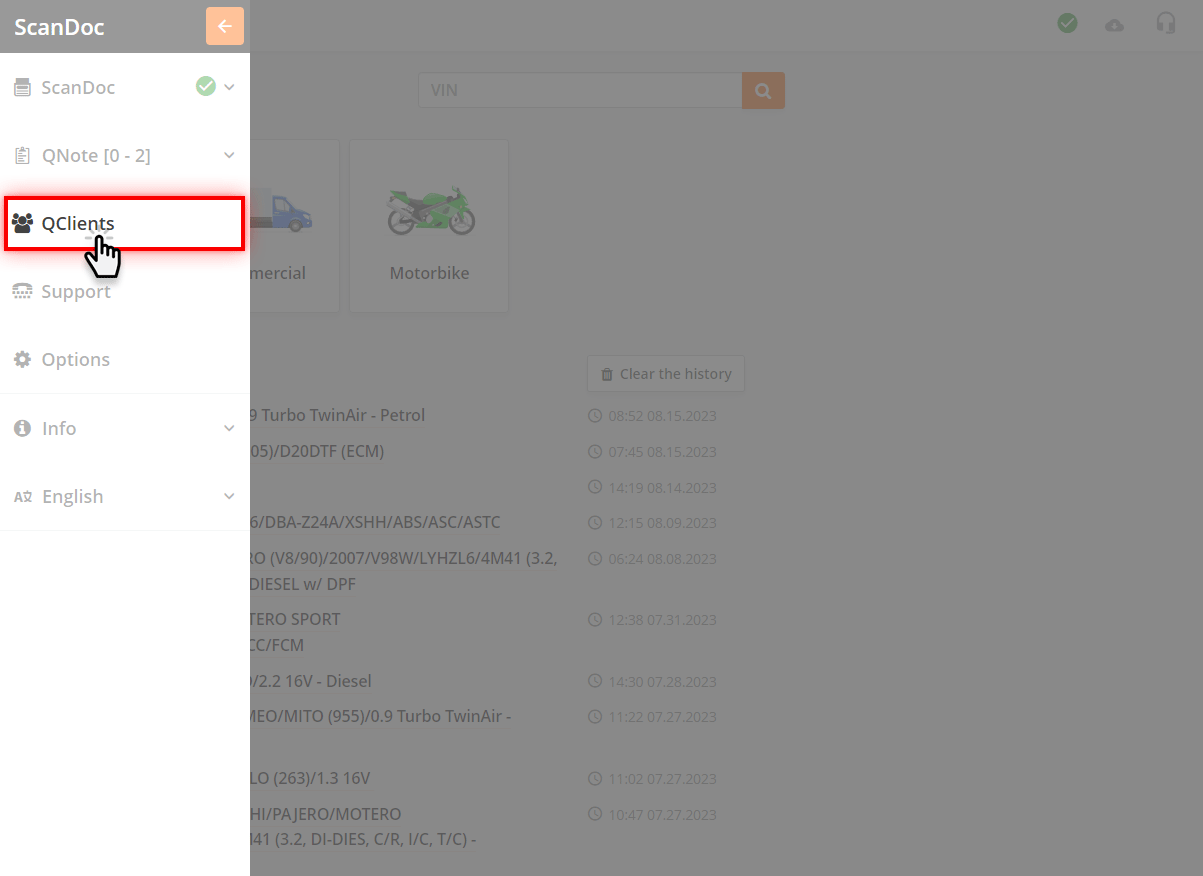
To open the QClients program, follow these steps:
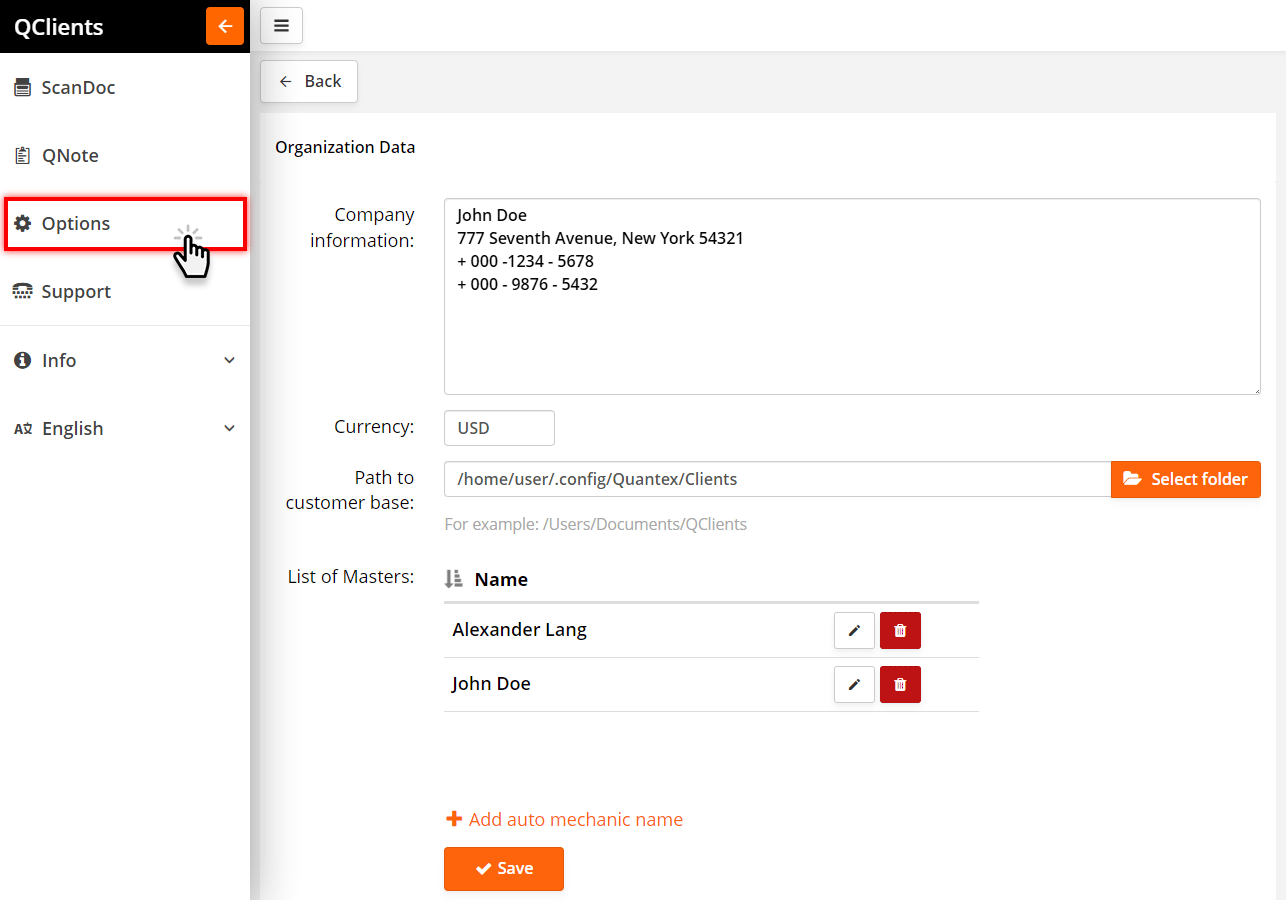
To go to the program settings, follow the steps:
The program settings allow you to:
By default, the path to the database points to the application's local folder. When the app is uninstalled on mobile devices, this folder will be permanently deleted along with the data. To preserve your database, specify a path to the folder where you want to store it in this setting. A good solution would be to use a folder on a cloud drive. This way, you can synchronize data between devices. Please note that you cannot work simultaneously with the customer database on different devices

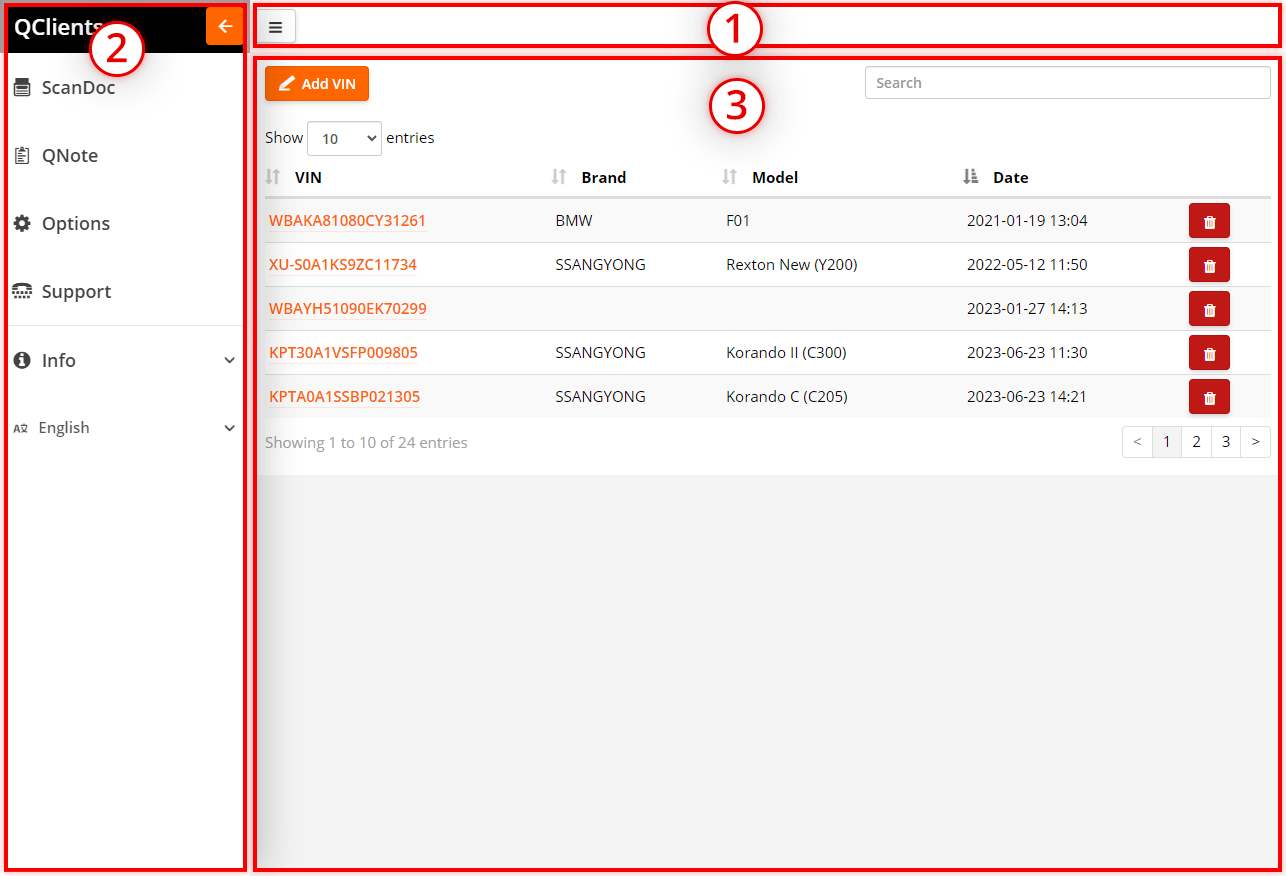
A window will appear with a list of VIN numbers of cars that have already come for diagnostics and are stored in the database.
If the VIN was automatically subtracted from the ECU, but was not found in the customer database (that is, the car is being diagnosed for the first time), then you need to add it to the database using Add button.
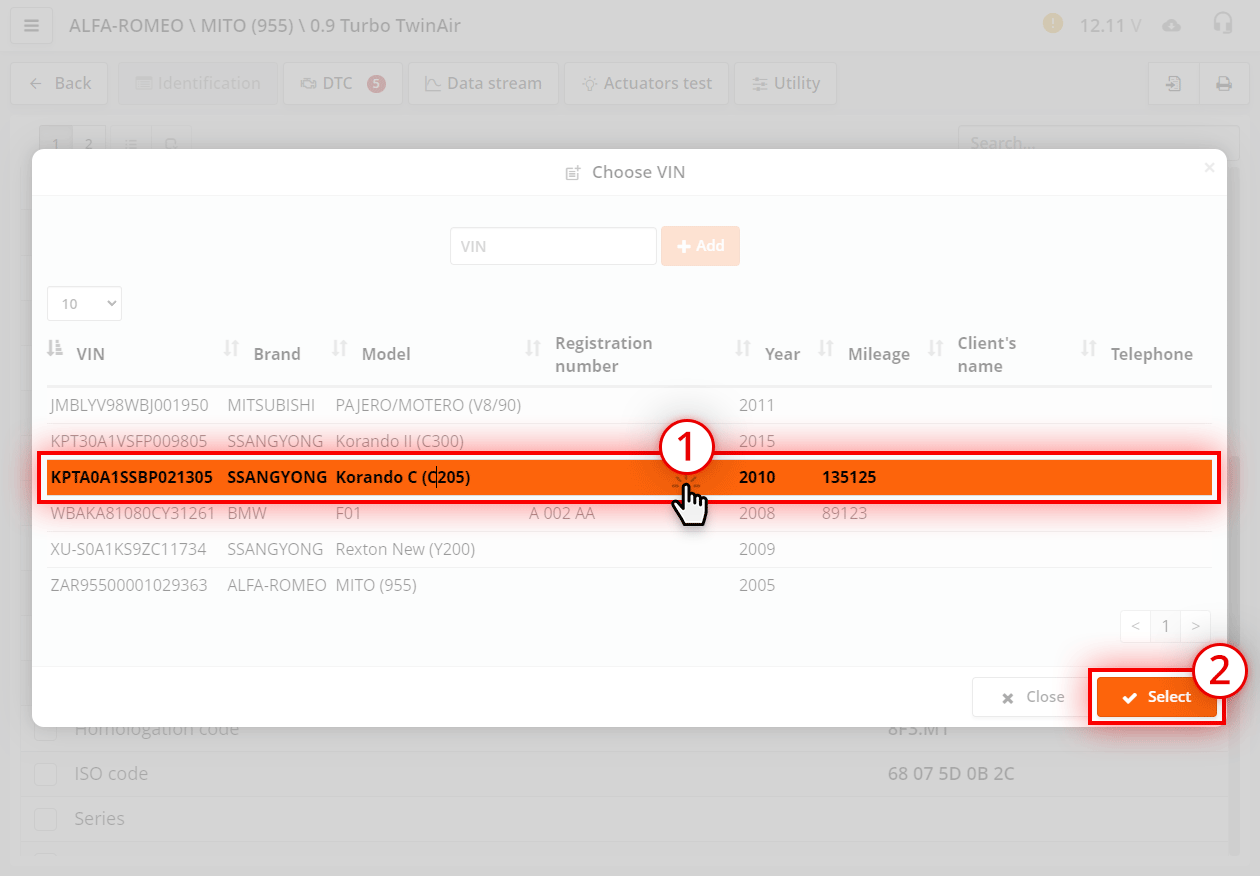
If the VIN was not considered to be a scanner from the ECU, but the car was already in the diagnostics, then you can add the current data to the VIN number that was already created earlier.
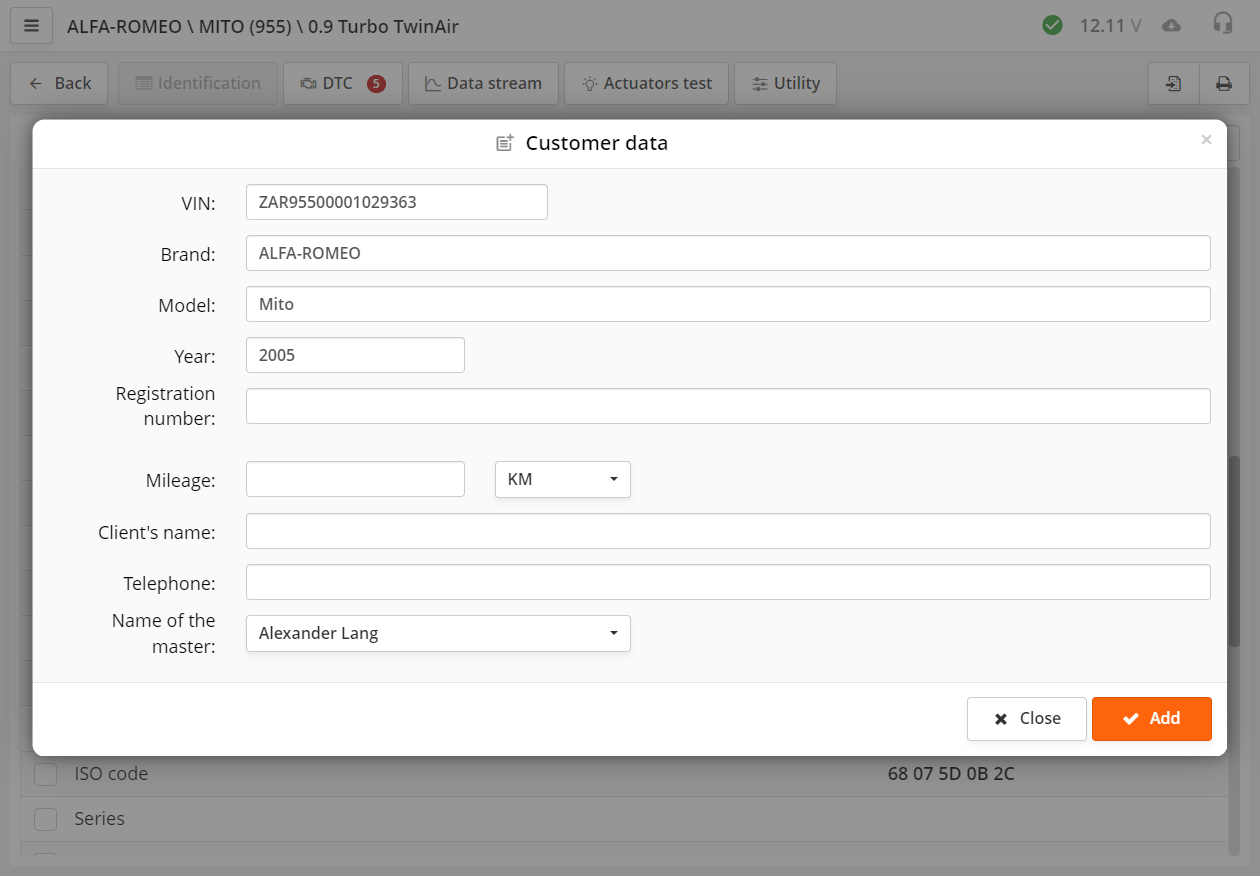
Next, fill in the car card (part of the data that was subtracted from the VIN code will already be substituted in the appropriate lines) and press the Add button.
Now the VIN number has been added to the QClients program. You will see a notification in the top right corner of the program.
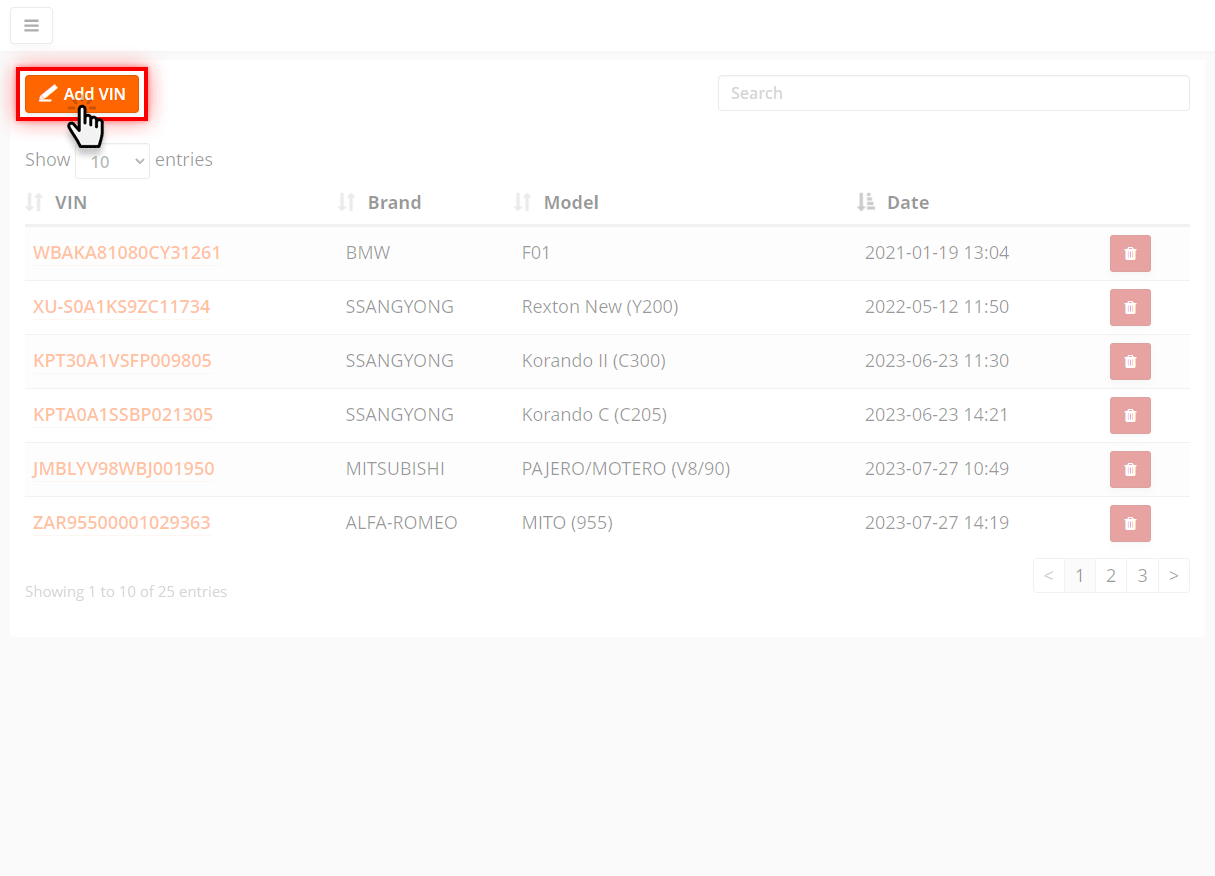
To add a VIN to the database, you must perform the following steps:
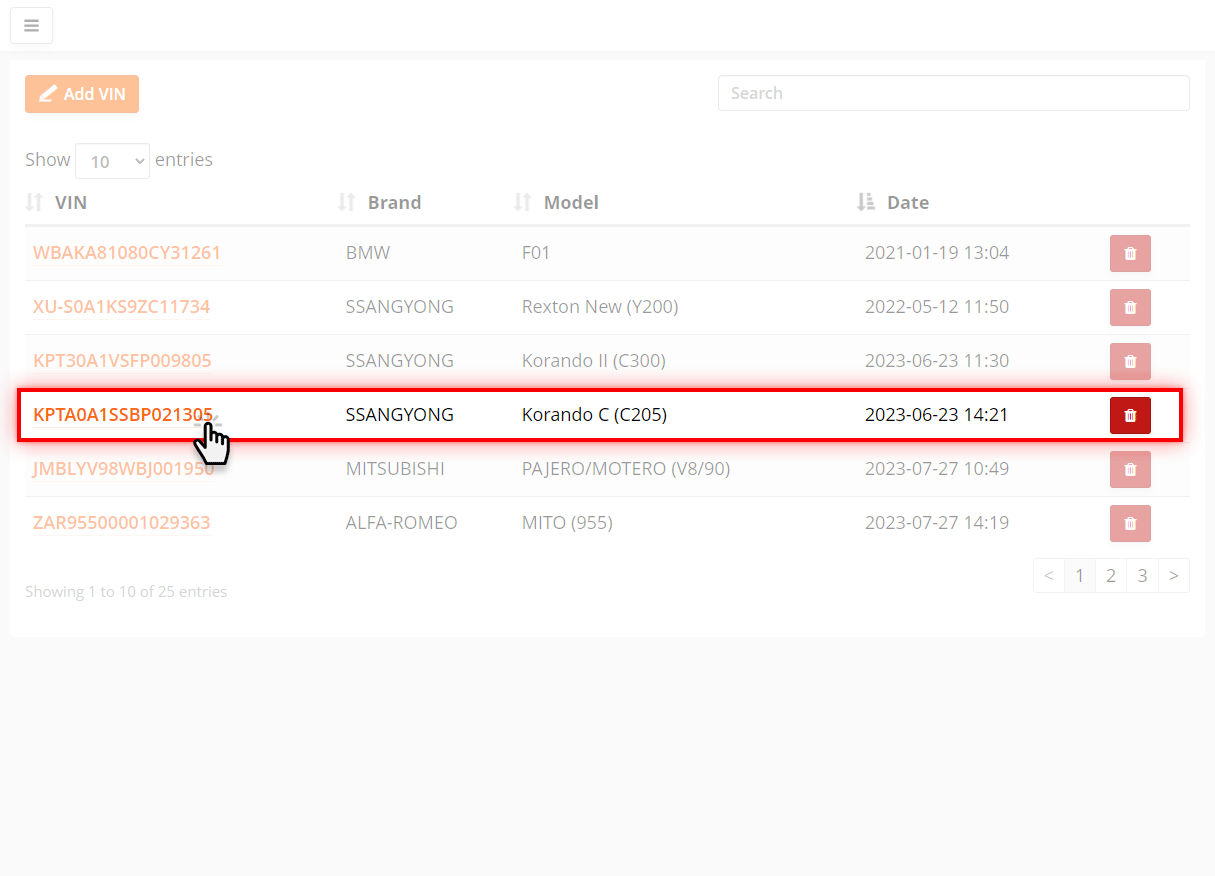
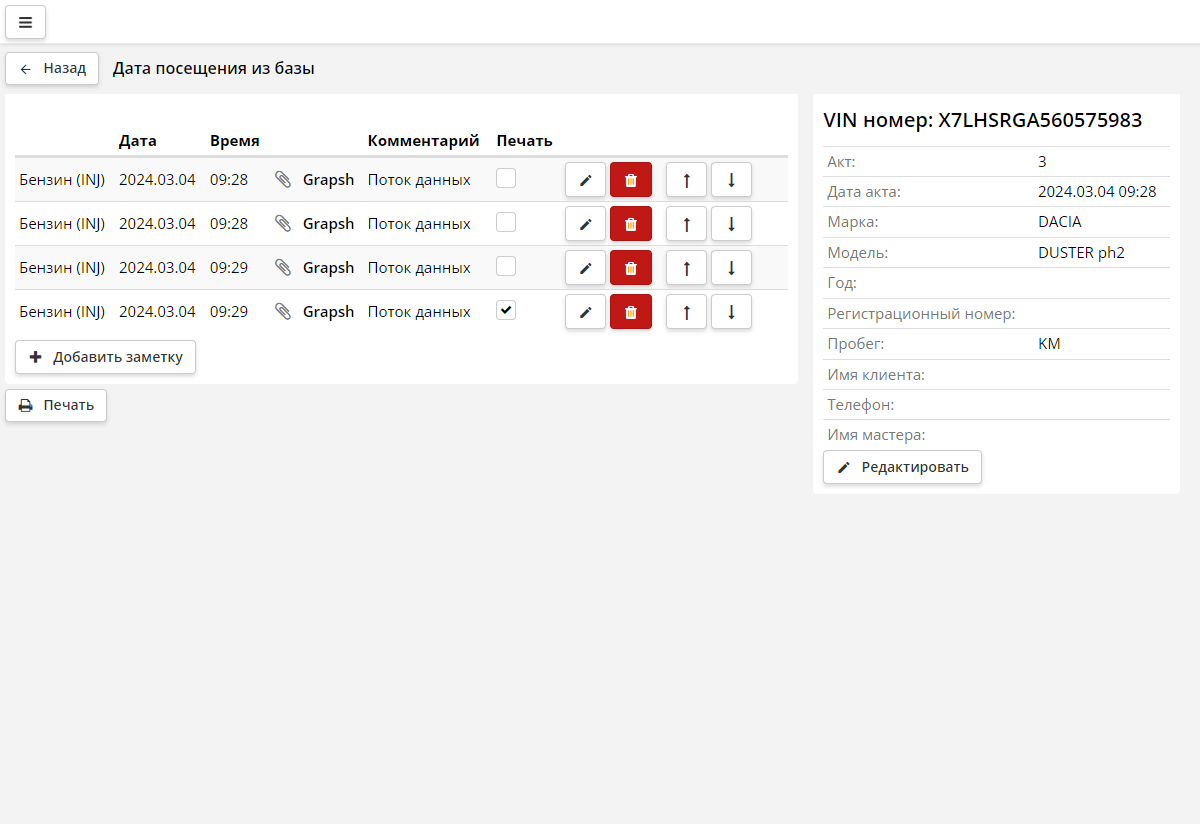
Click on any VIN number from the list and you will be taken to the list of visits for this car.
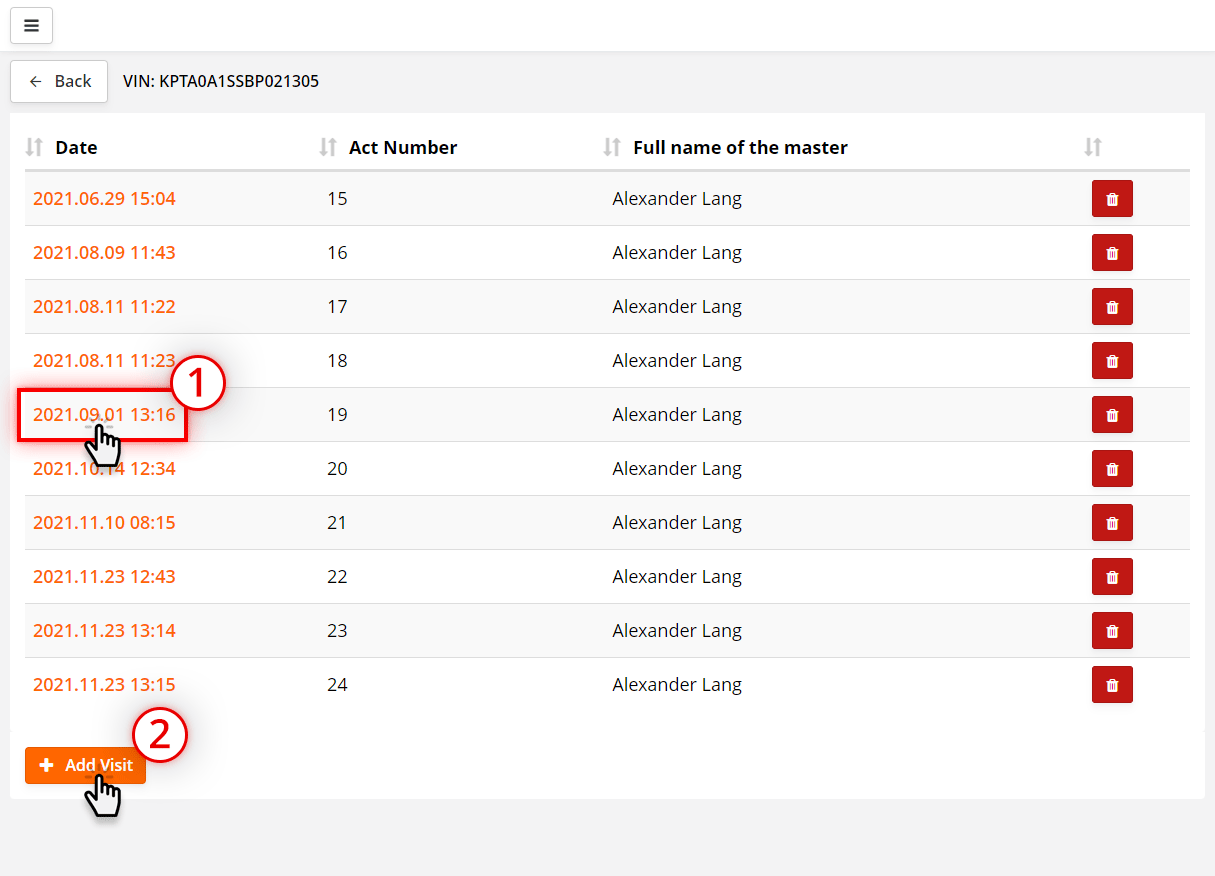
The list is a table that displays all visits to this car.
To delete an entry, press the button.
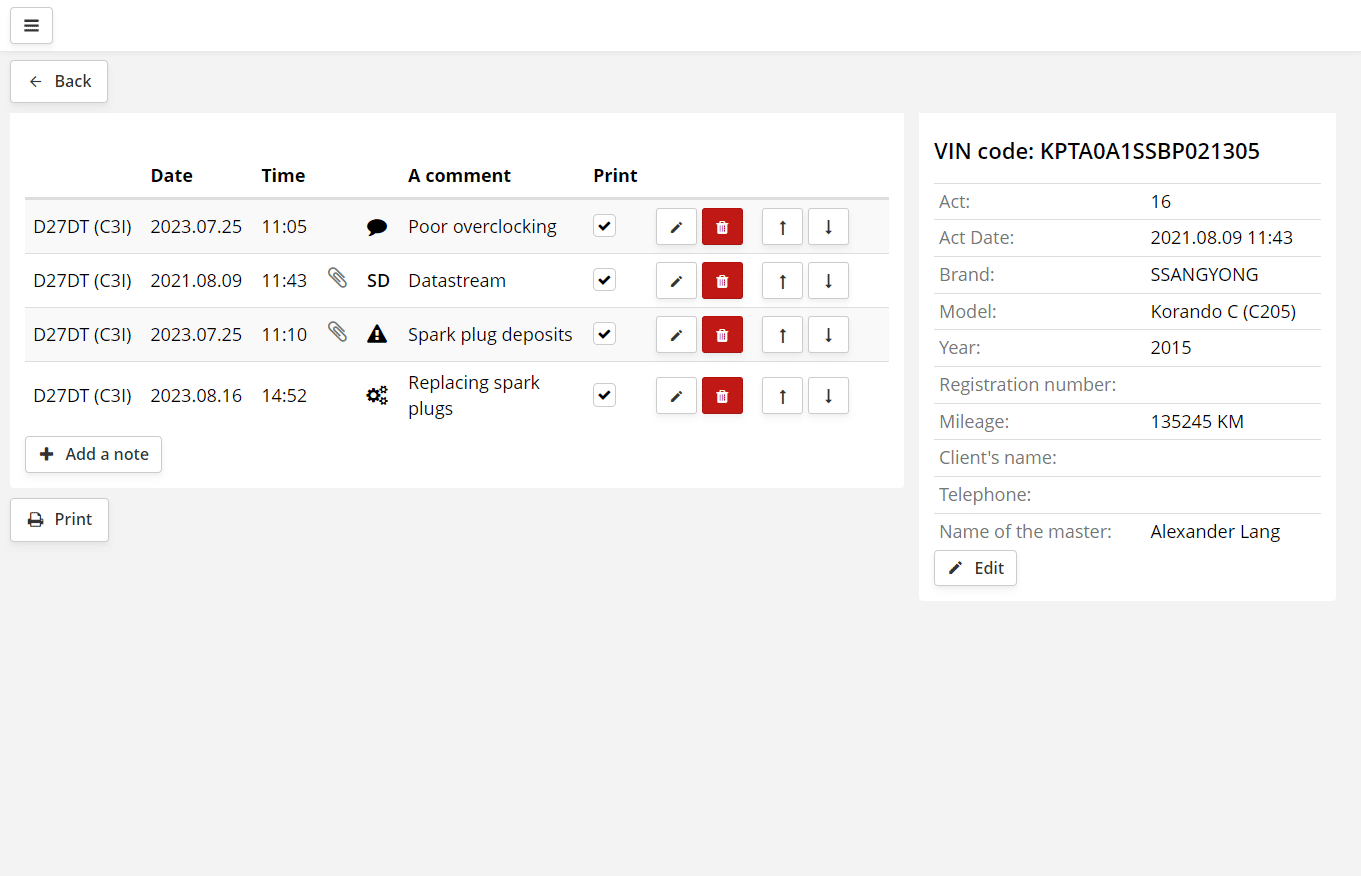
The visit is a table that displays all the events of the current visit.
In the current example:
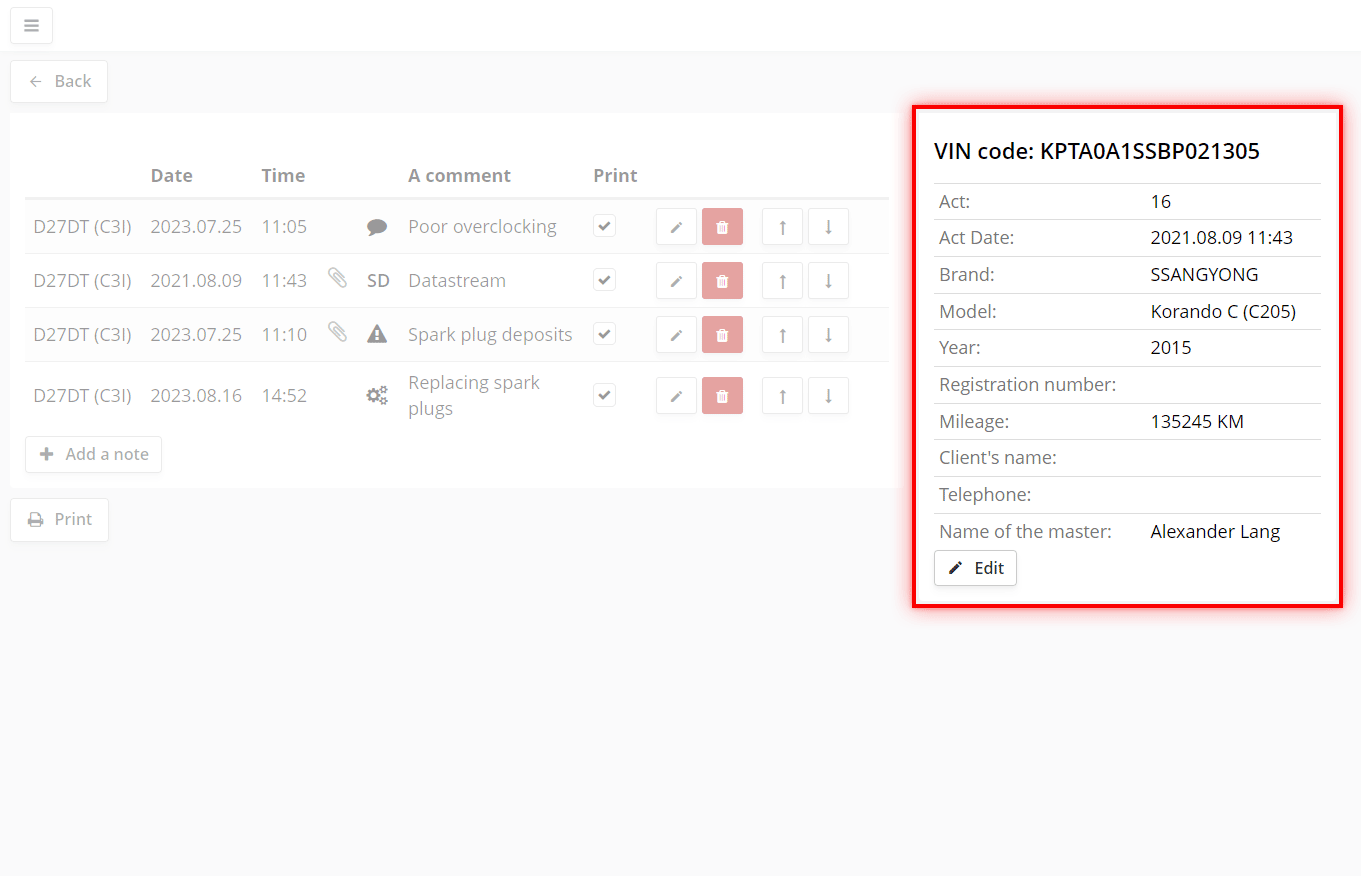
On the right side of the screen is a customer card. The data in the card is filled in automatically from the subtracted VIN number of the car, when working in the ScanDoc program.
To edit them manually press Edit button.
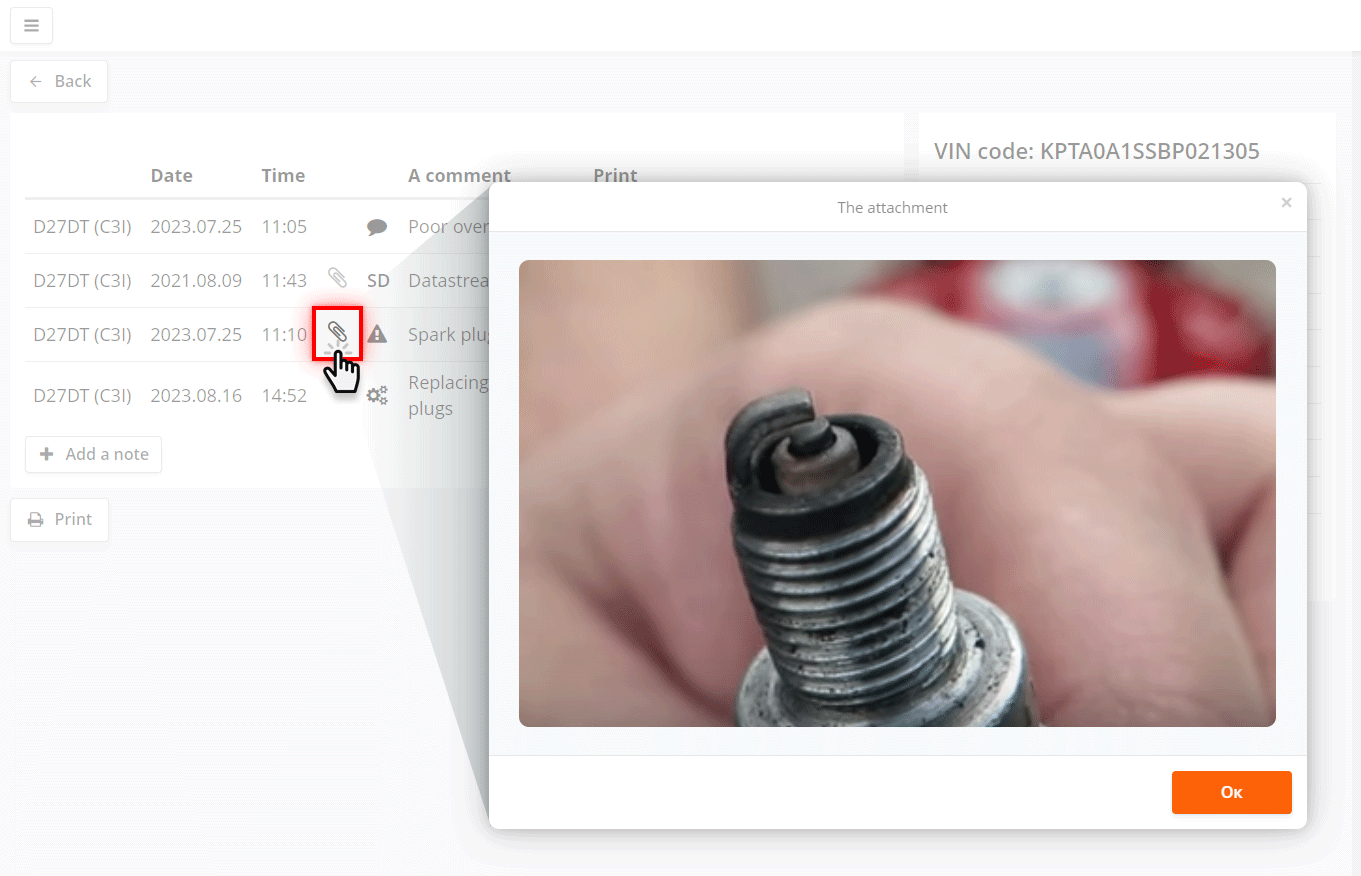
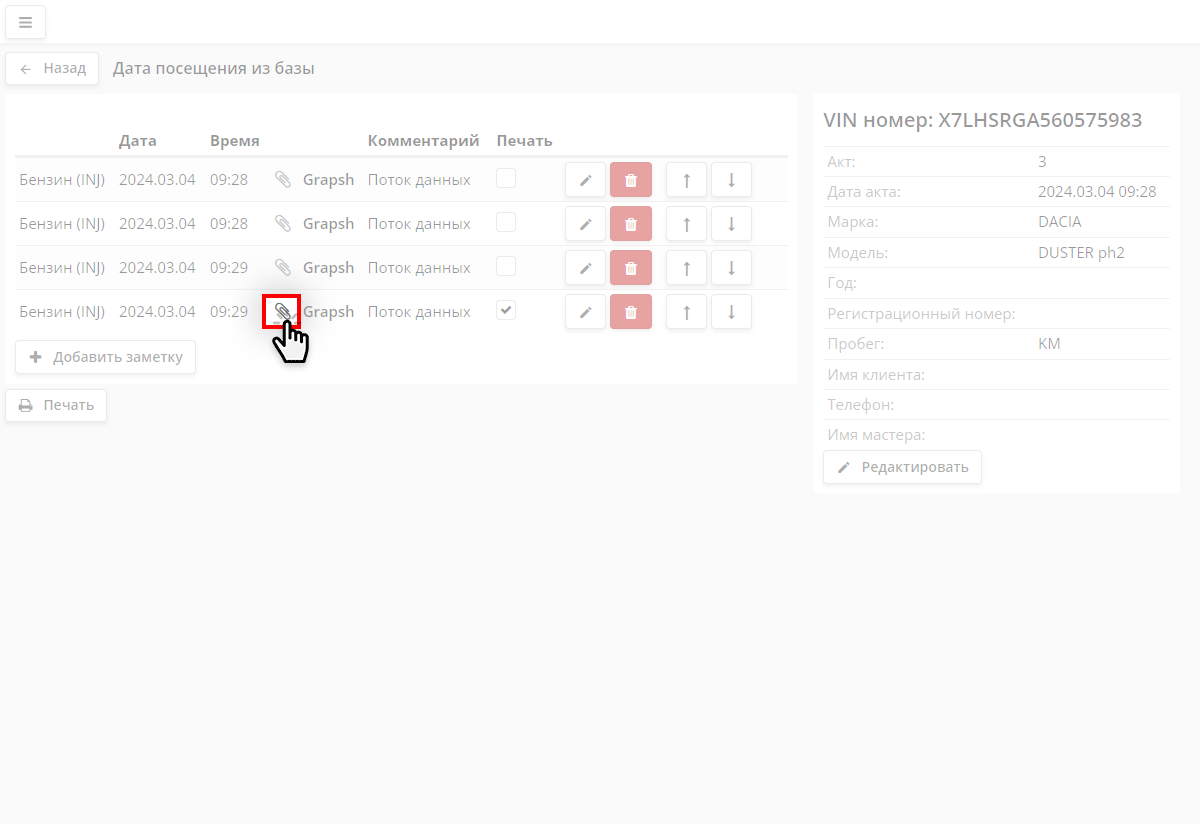
To quickly view the attachment, click on the icon.
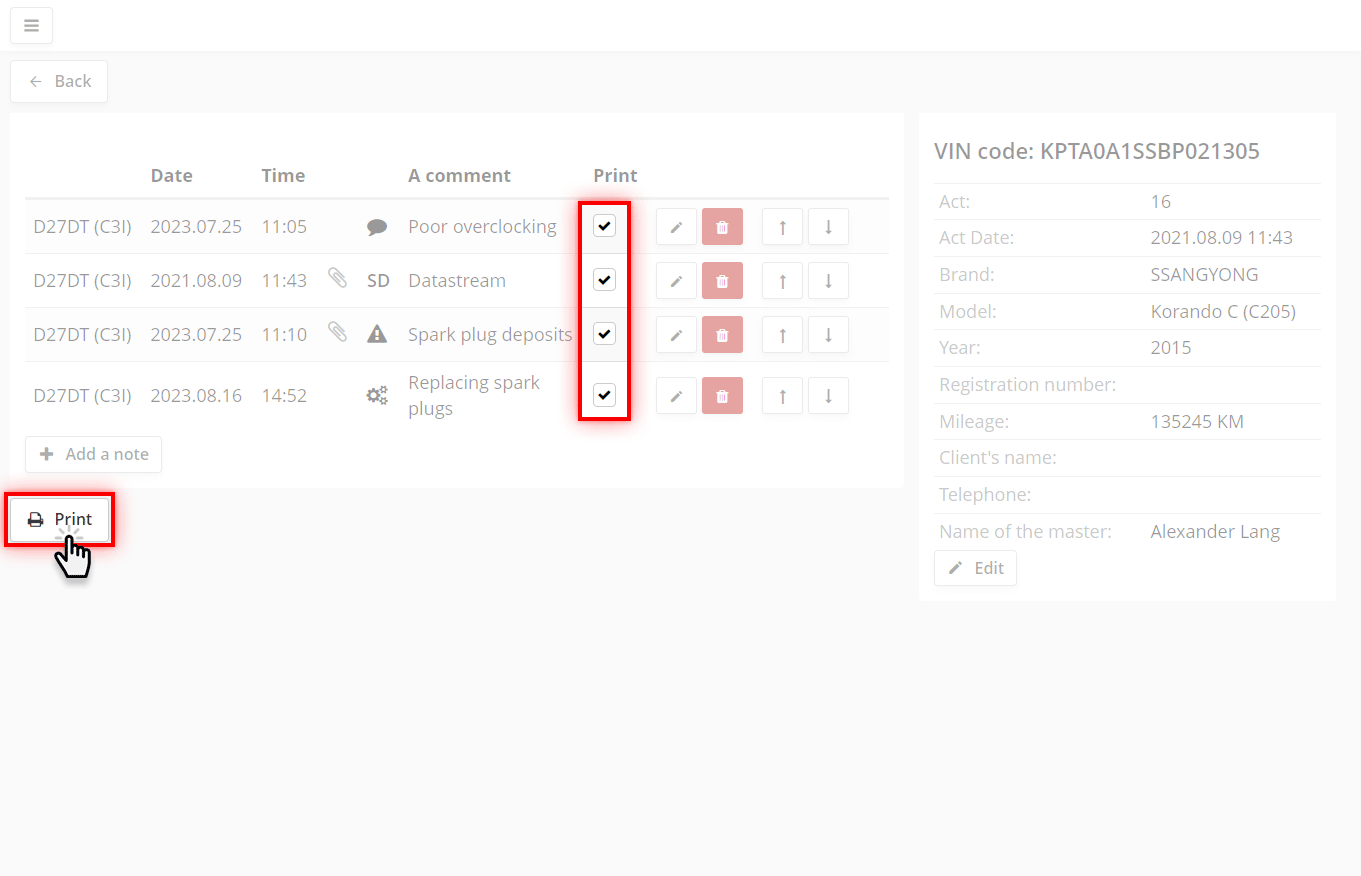
To print the visit with all current notes, press the Print button.
If you need to print only part of the notes, check the checkboxes in the "Print" column for only the necessary notes, and then click the print button.
The report can be printed or saved to your computer in PDF format.
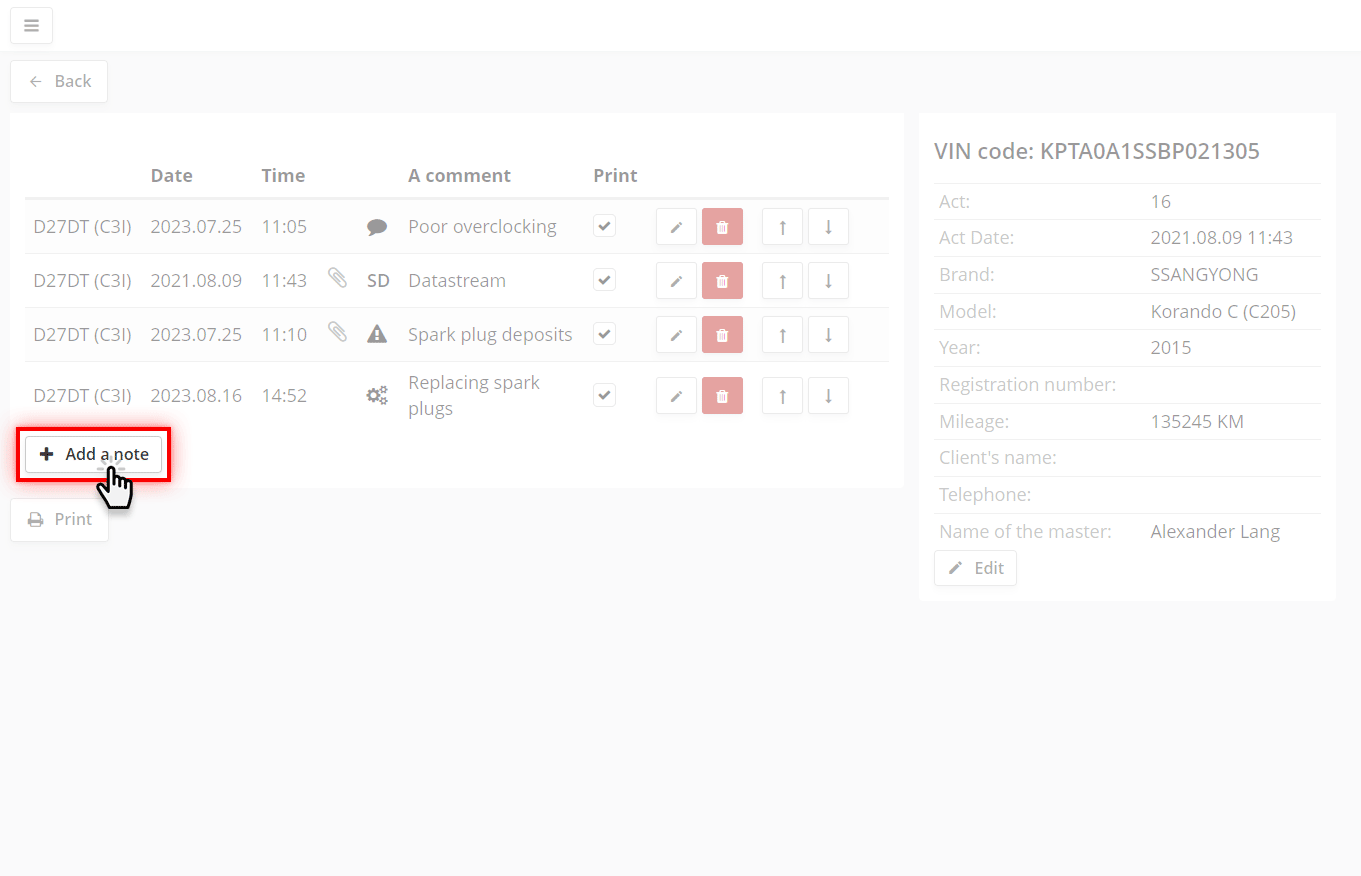
To manually add a note to the visit, press the Add a note button.
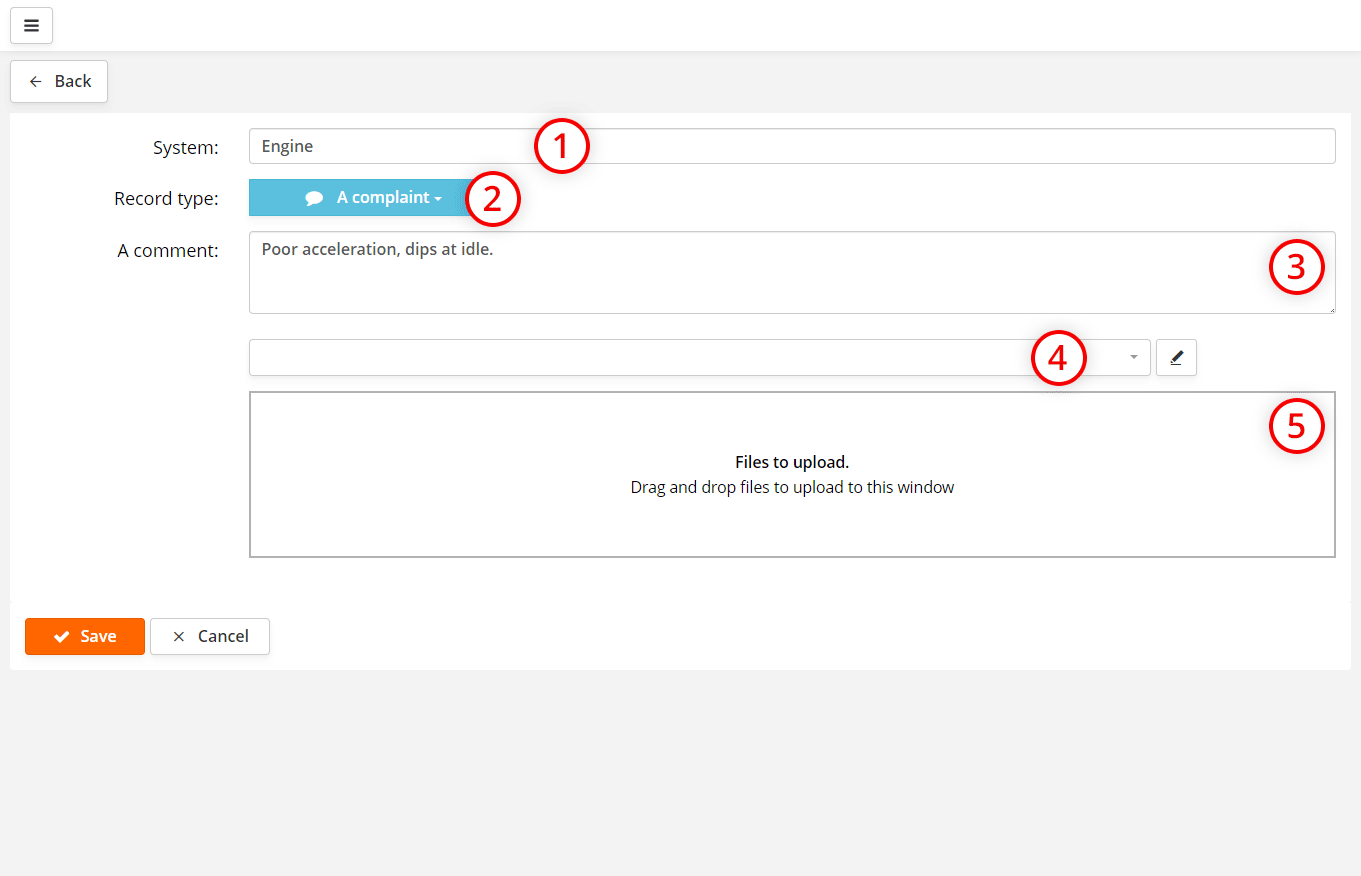
| A complaint | - description of the client's complaint about the system; | |
| Defect | - description of the defect due to which the system does not work correctly; | |
| Detail / Work | - information on replaced parts of the system, as well as their price; | |
| Recommendation | - recommendations given to the client; | |
| A comment | - comments of the master or client; | |
| Firmware | - software stored in the database that has been loaded into the vehicle system; | |
| Gas analyzer | - gas analyzer data; | |
| The photo | - photos added to the post. |
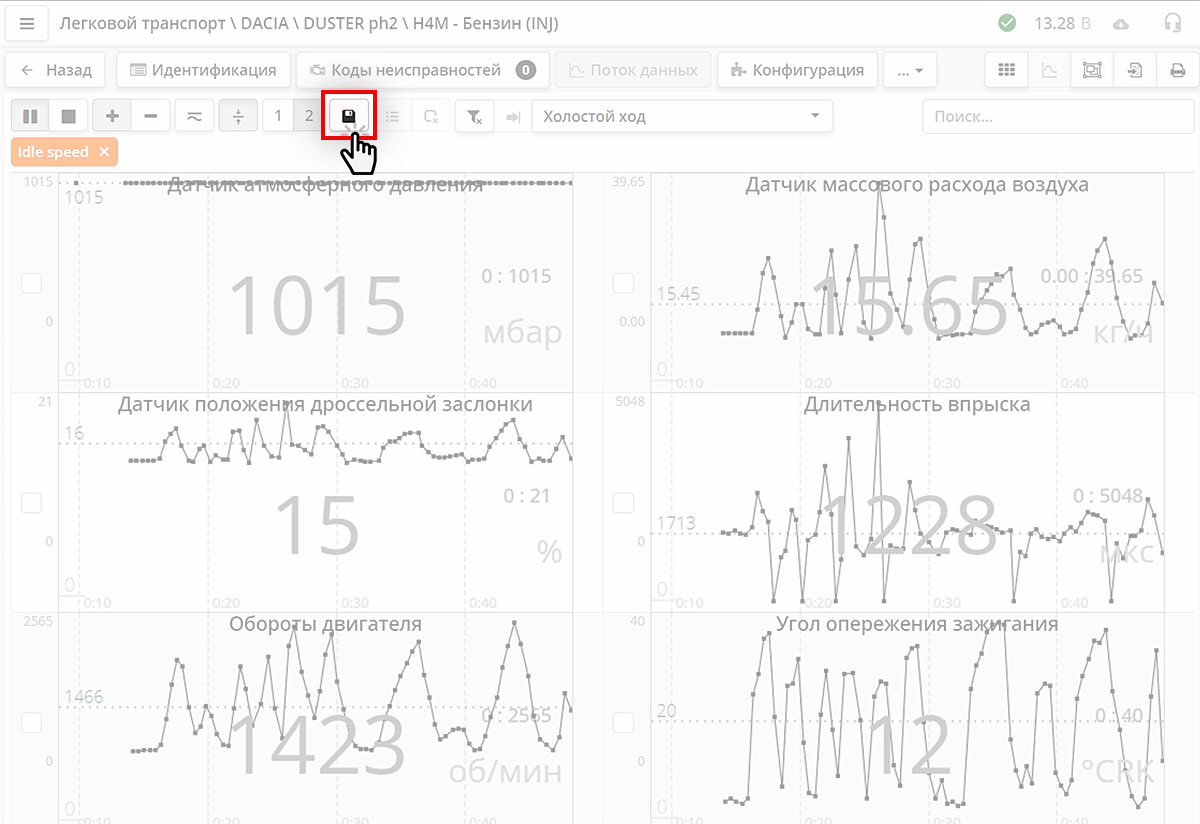
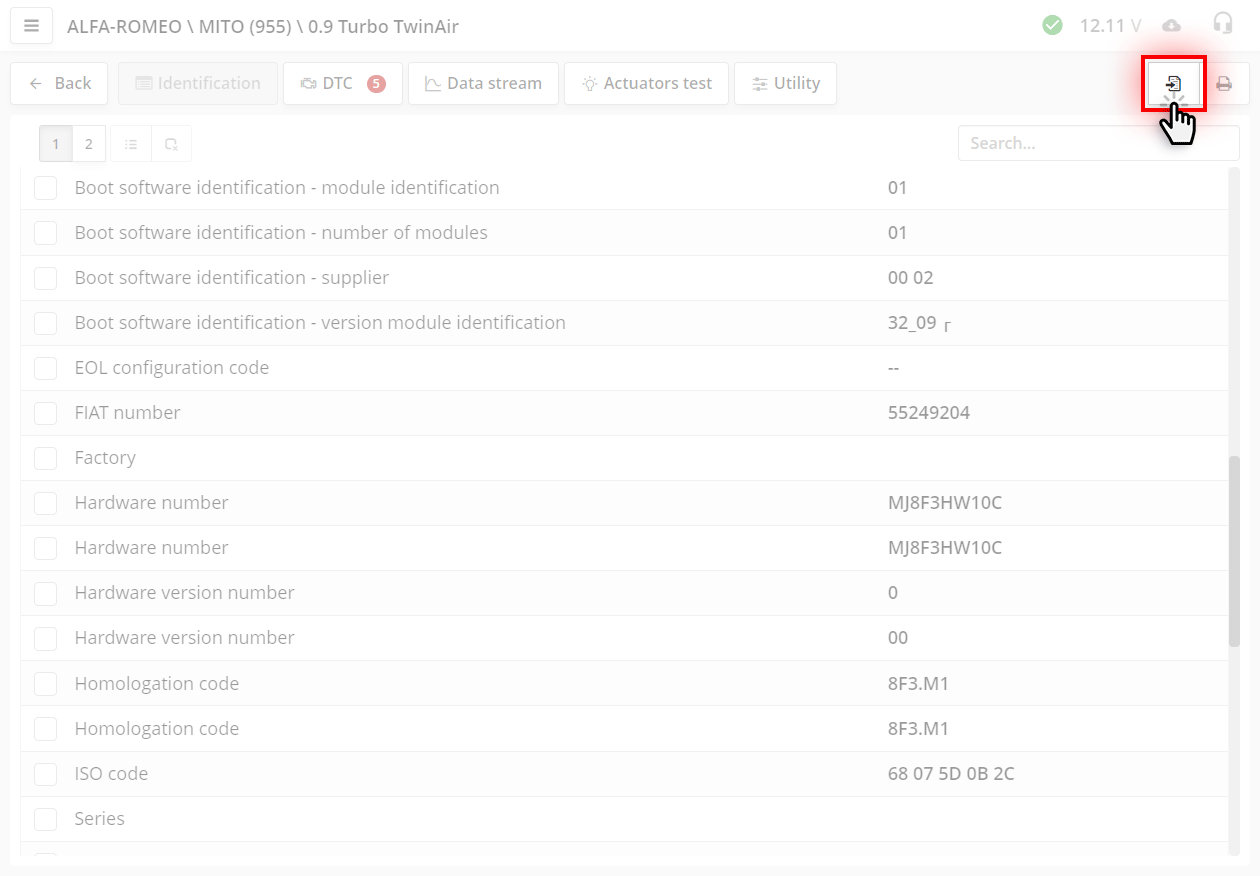
You can save the data stream from ScanDoc program to Clients during work. In ScanDoc program in the data flow window click the button button.
The data will be saved to the Clients program on the current device.
You will see an alert in the upper right corner of the program when the save is successful.
A record will appear in the current visit to save the data stream
To view the data stream click on the icon.
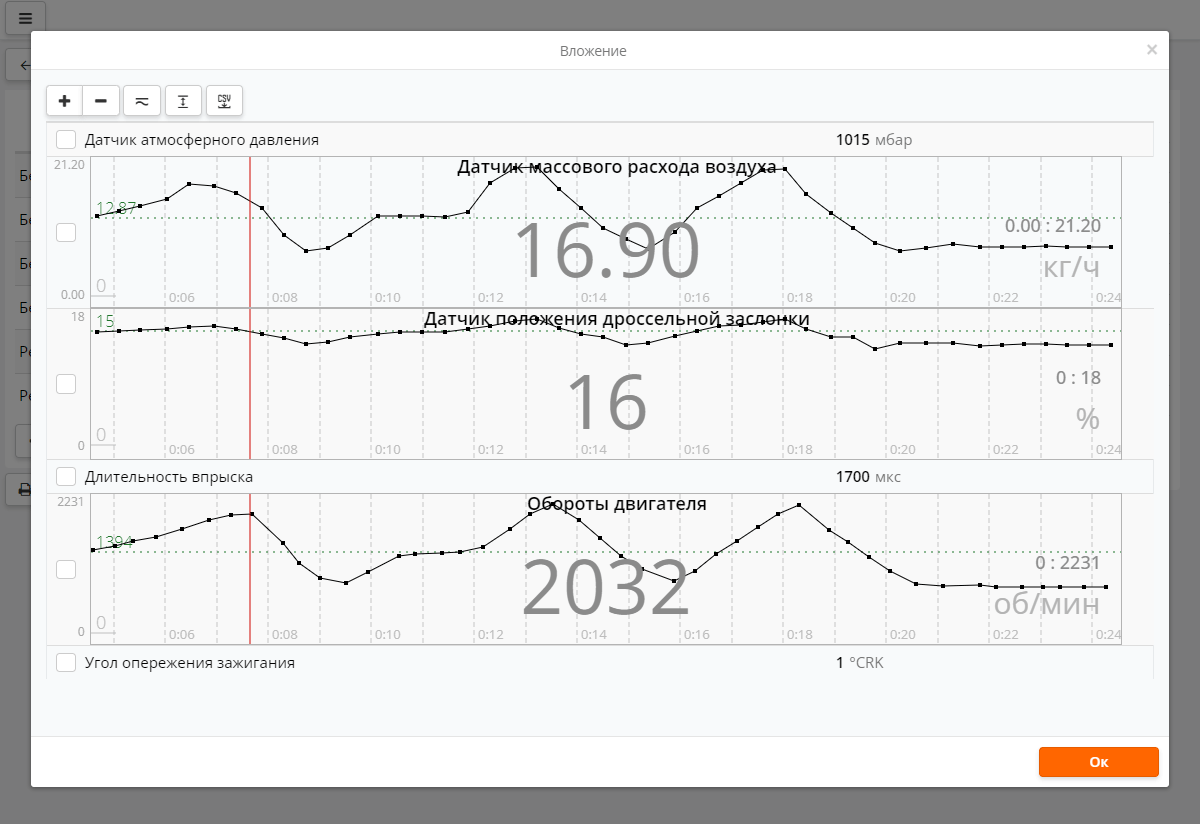
The saved data stream will appear in a new window.
As in the ScanDoc program you can:
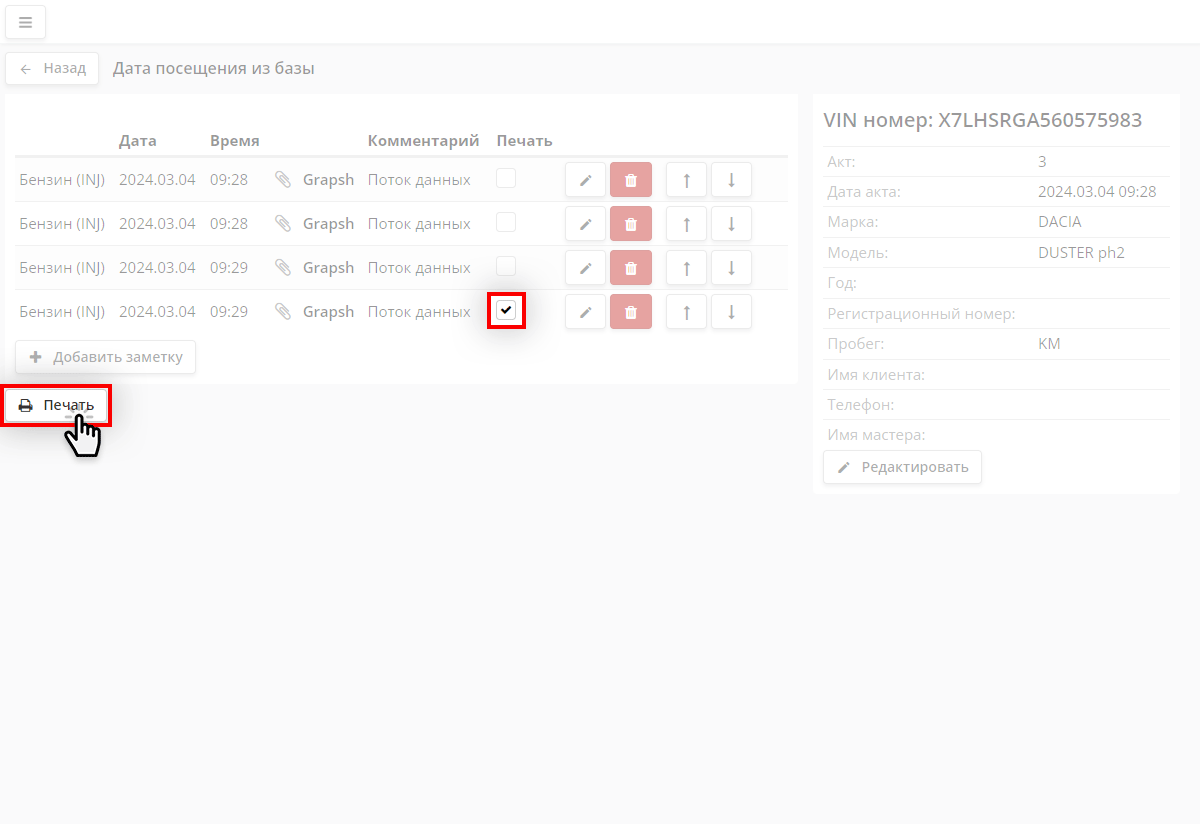
To print data from a visit, select it with a check mark and press the Print button.
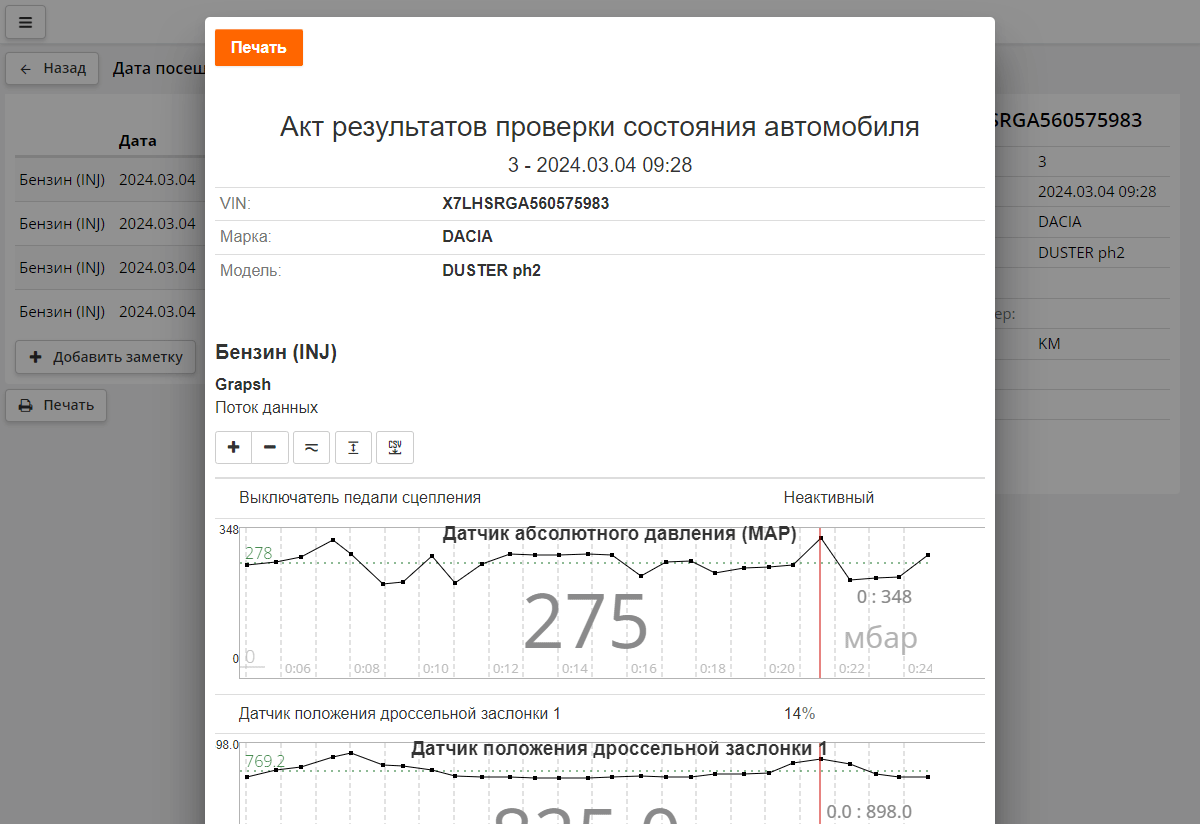
An inspection report form will appear.
Here you can also click parameter names to view them digitally and graphically, zoom in and out, etc.
To print the document, press the Print button.
Save the data stream during diagnostics. To do this in the ScanDoc program in the data flow window click the button.
The data will be saved to the Clients program on the current device.
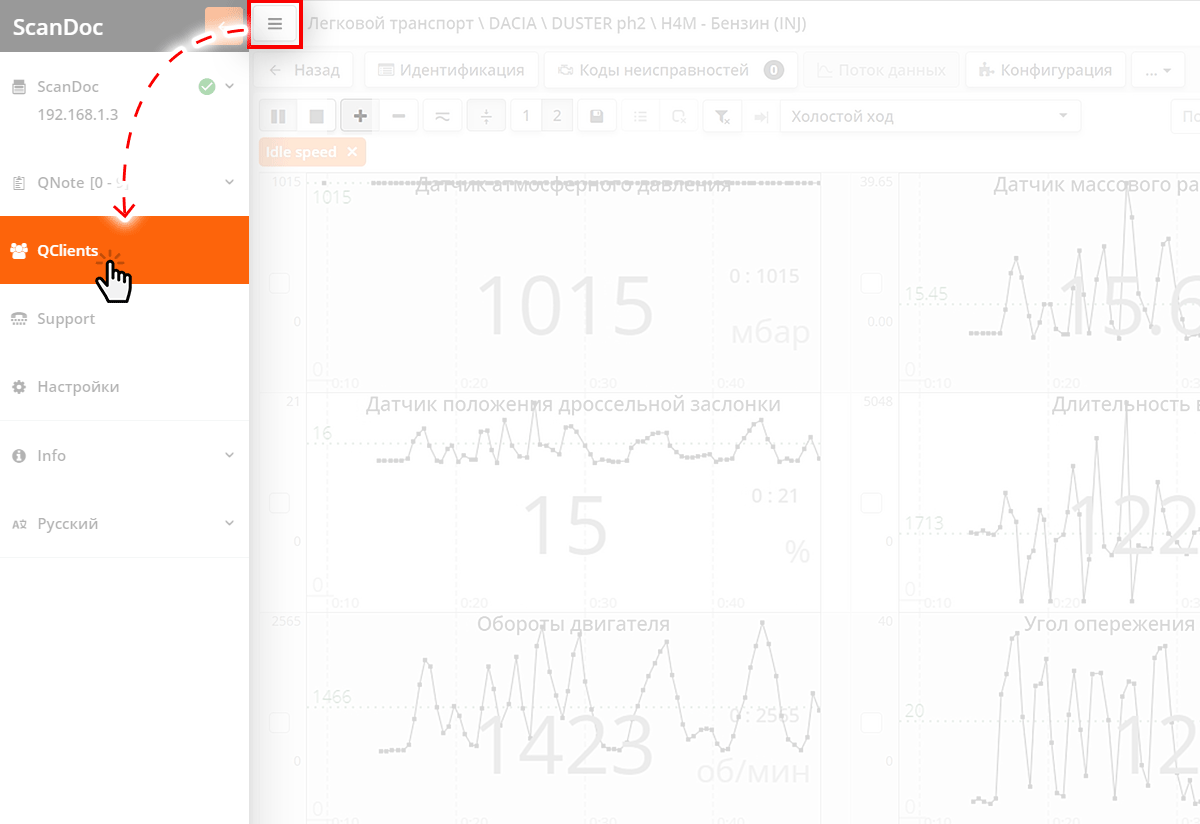
Open the QClients program:
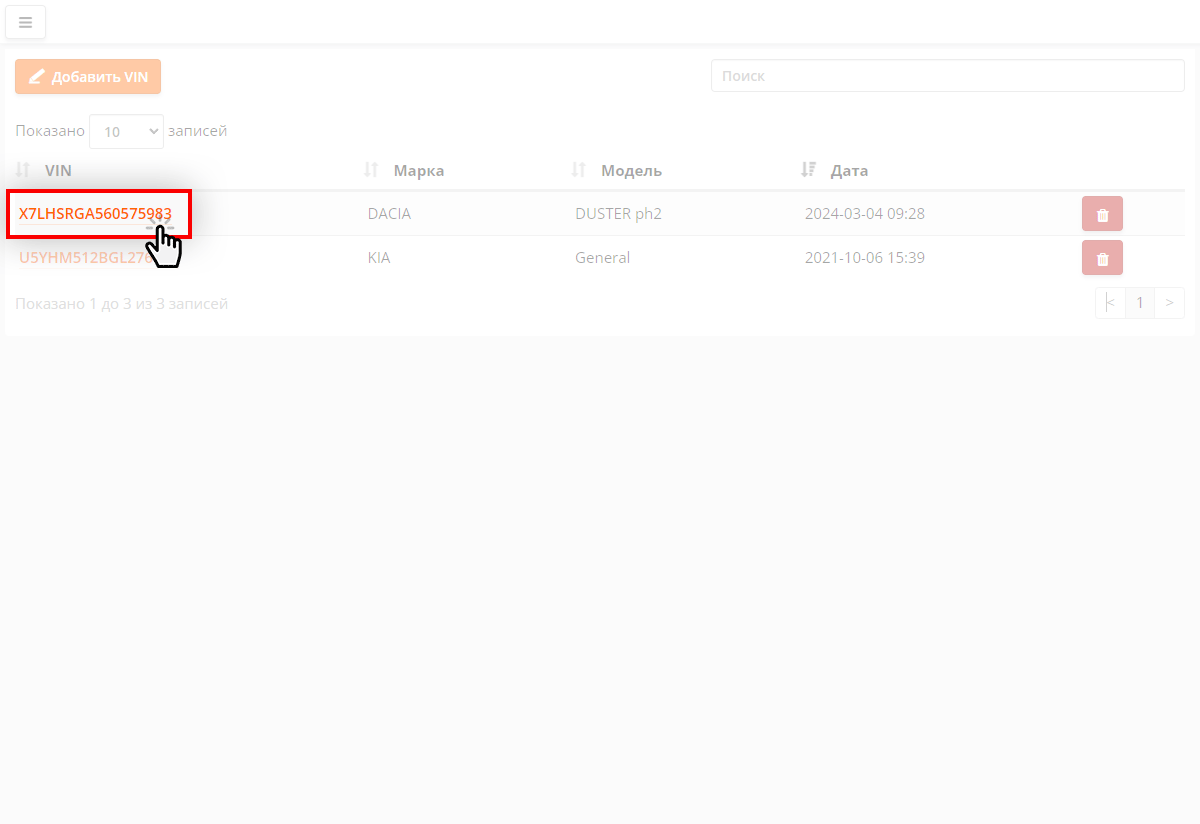
Select the vehicle's VIN number and the date of the visit.
Click on the icon to view the data stream.
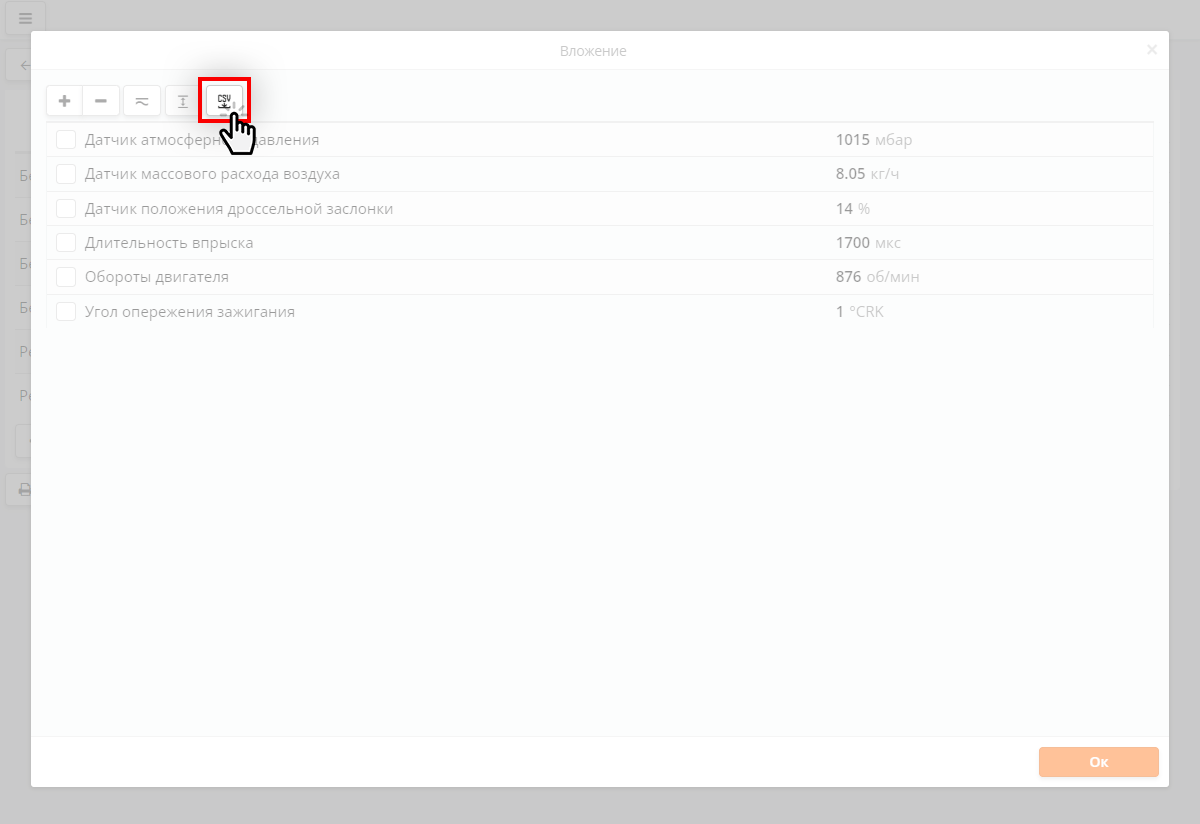
In the new window, click on the button.


