Compact has a default WLAN password.
If your scanner has serial number s/n: 06052, then the connection will be called S6052, and the password for it will be scandoc6052. You can change the password on the settings page of the WLAN module..
If you need to reset all WLAN settings to factory defaults, then for this you need to switch the scanner to boot mode.

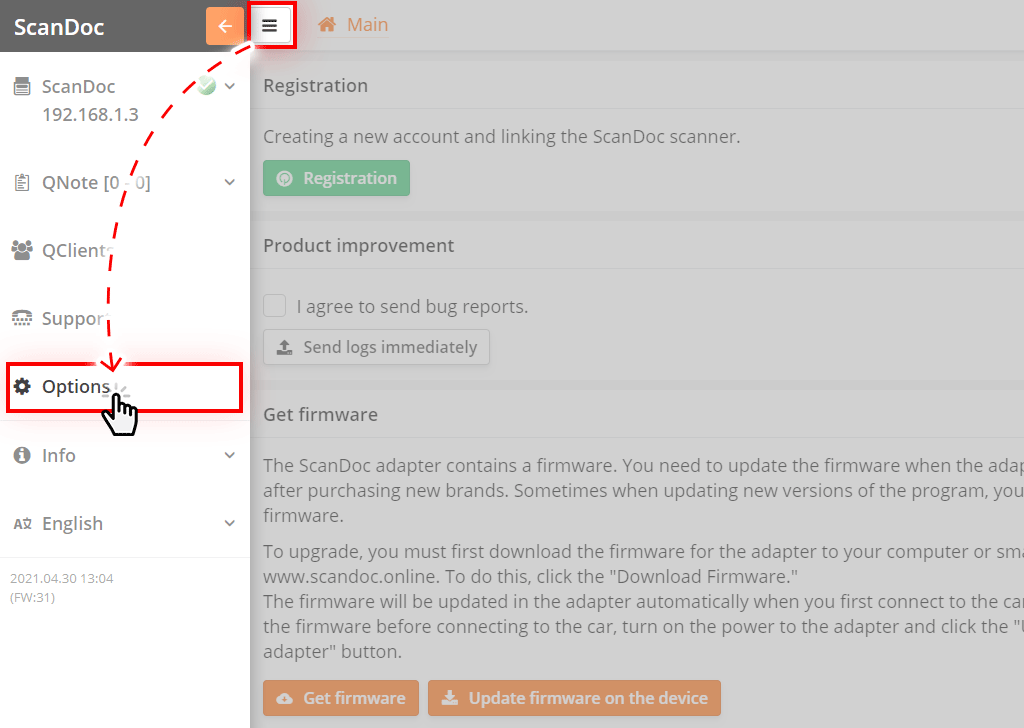
To use the ScanDoc program, you need to update the firmware in the scanner by clicking the Update firmware on the device button in the adapter button in the ScanDoc program settings.
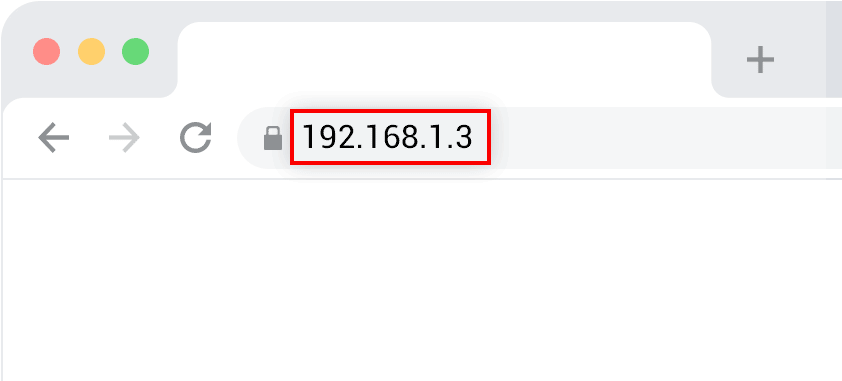
To enter the WLAN settings mode, in your Internet browser type the address: 192.168.1.3
This address is set by default in the scanner.
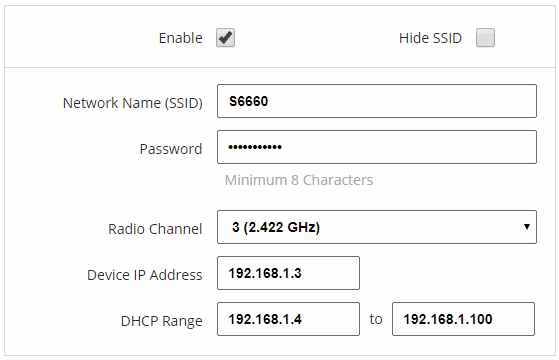
If you uncheck Enabled the access point mode will be disabled.
(Compact can work in access point mode and infrastructure mode both at the same time)
If it is necessary that the name of the wireless connection does not appear in the list of available networks, check the Hide SSID name checkbox, in this case, you can connect to the hidden access point only by specifying its name manually.
Network Name (SSID) - Set the name of the wireless connection that will be displayed in the list of available networks (by default, the serial number of your scanner).
Password - Set a password to connect to the scanner.
By default, your device already has a connection password - scandoc + the serial number of your scanner without leading zeros (for example: scandoc6060).
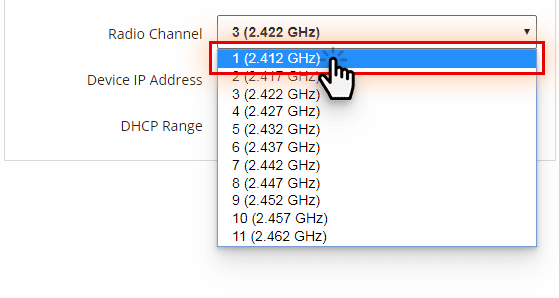
Radio channel - data transmission channel of the WLAN module. If WLAN connection with the scanner is unstable, try changing the communication channel to another. The default is 1 channel.
For mobile devices, there are free programs that can identify any of the nearby channels are heavily loaded. More ›
Device IP Address - The IP address of your scanner.
DHCP range - set the range of IP addresses in which communication with the WLAN module will be carried out.
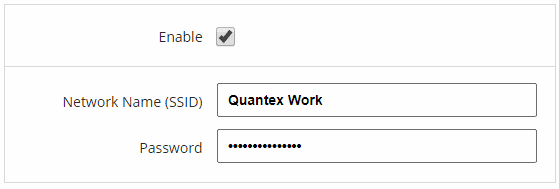
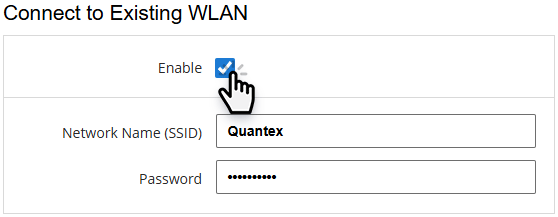
Here you can set the name and password of a network that already exists.
Enabled - check to enable these settings.
If this box is checked, then the network should be available. Otherwise, the adapter will constantly look for a connection to this network and will not even connect directly to a computer or mobile device.
One of the following conditions is required to restore the connection:
- Get within range of the router;
- Uncheck (disable) the checkbox.
Network Name (SSID) - Enter the name of the existing network.
Password - Enter the password of the existing network.
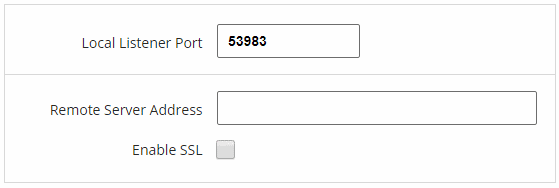
Local port - set the local port (if the scanner connects online).
Remote server address - set the IP address and port (if the scanner connects as a "client").
If all the columns are full, then the scanner will first try to establish communication with the remote server, in case of failure the scanner will connect to the IP address from the Enable SSL protocol column.

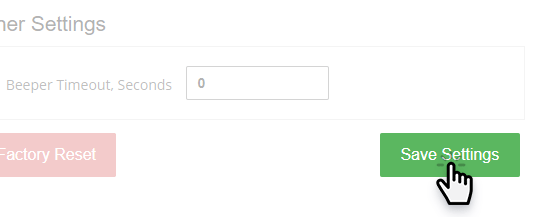
Set the beep timeout in seconds.
(The default is 5 seconds)..
Sound notification will be triggered if there is no data exchange between the WLAN module and the receiving device during the course of time. So that the scanner is not forgotten in the car after the diagnosis.

Select the file with the new WLAN module firmware. (If it's necessary)

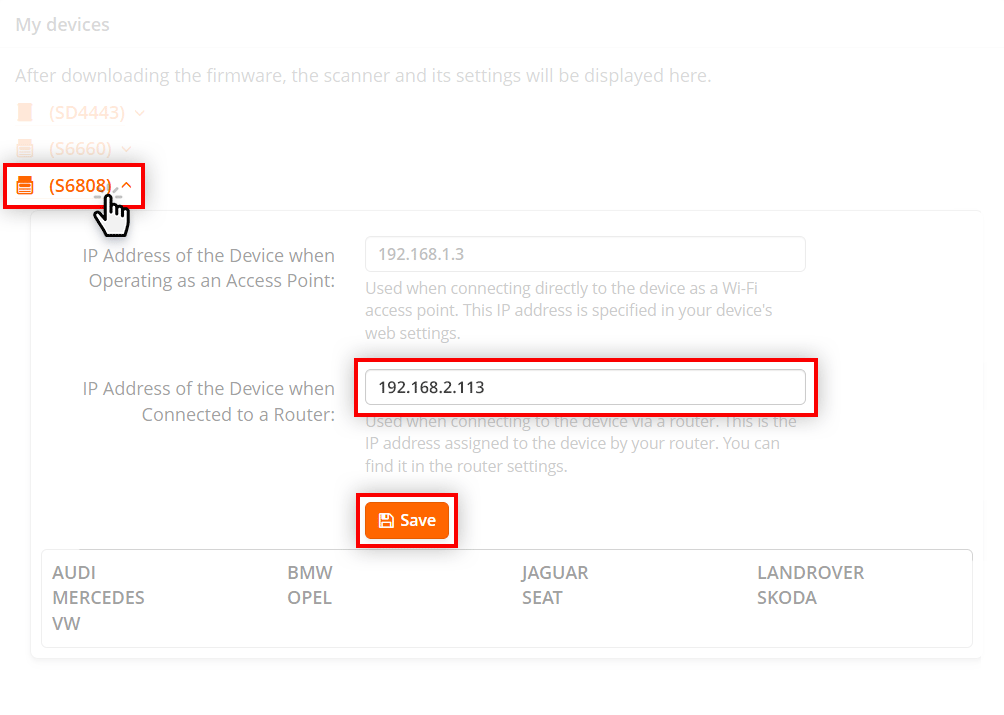
For convenient operation across multiple computers within the service center, you can configure the adapter to connect directly to your WLAN router.
This way, when the adapter is connected to the vehicle's OBD-2 port, it will be immediately
available for all employees — there's no need to connect to it with a laptop or smartphone.

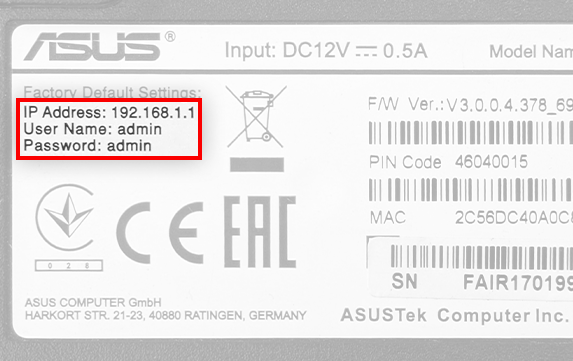
Different router manufacturers may use different addresses to access settings.
For example, TP-Link routers may use addresses: 192.168.0.1, 192.168.1.1, or tplinkwifi.net.
For ASUS routers, addresses may be 192.168.1.1 or 192.168.50.1 (for newer models).
The settings page address, as well as the username and password, will be printed on the back of your router.
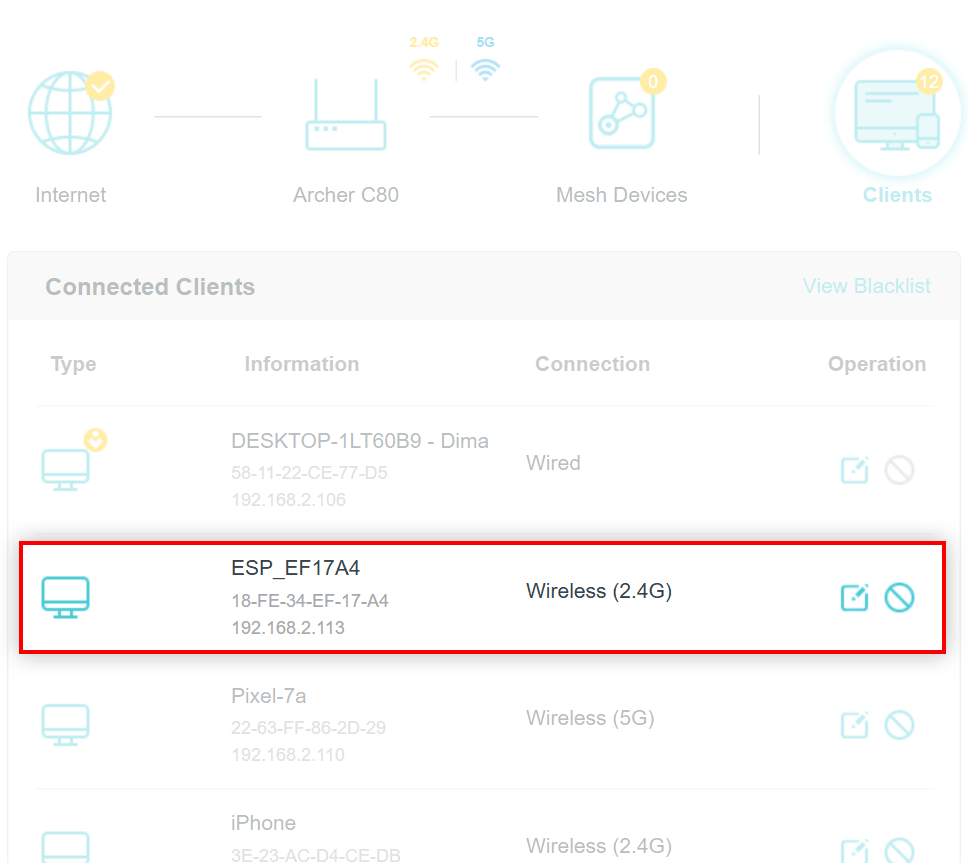
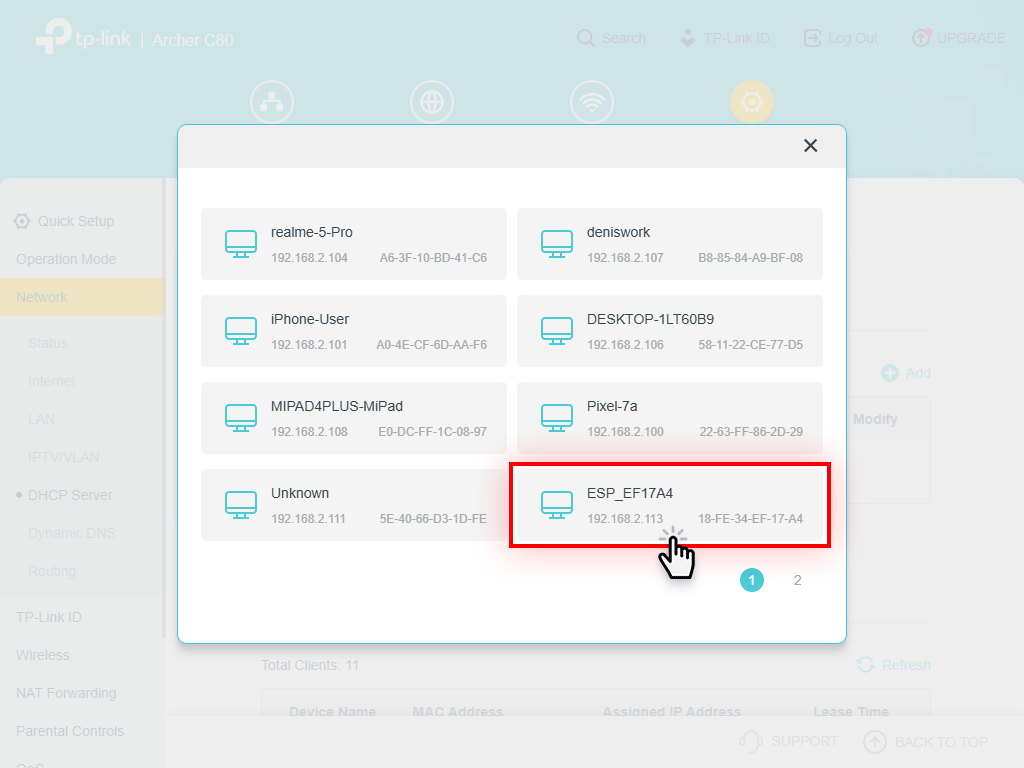
In our example, this is the connected devices page of a TP-Link router. The appearance of this page may vary for different manufacturers.
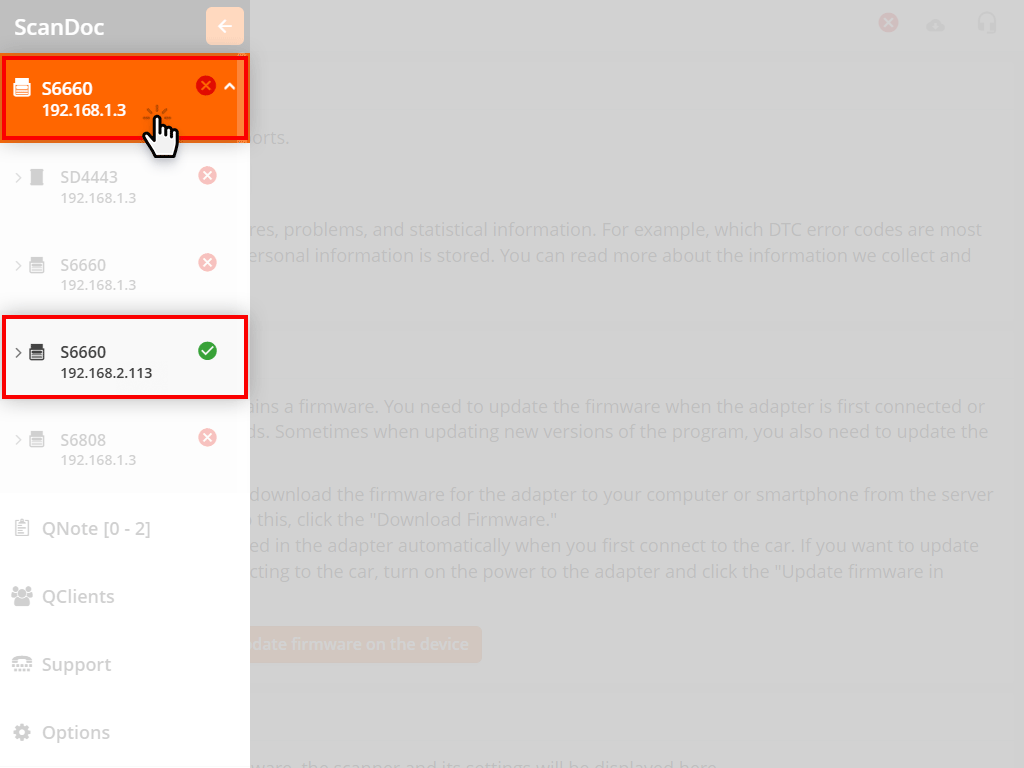
Done. The adapter will now be connected directly to the router.
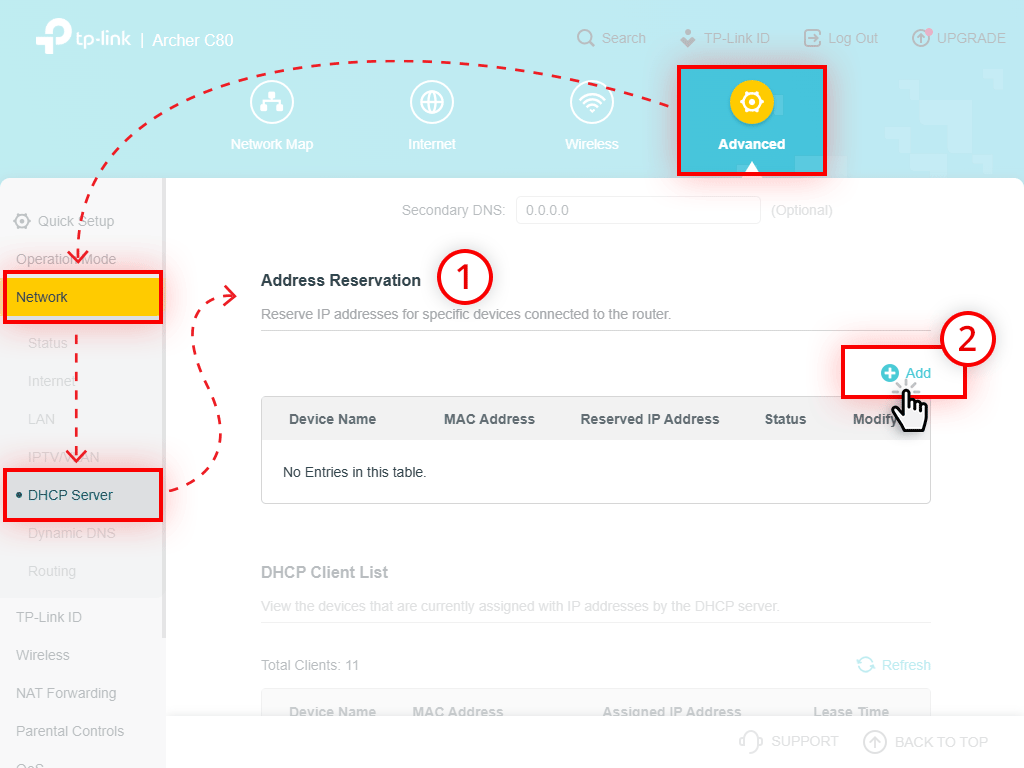
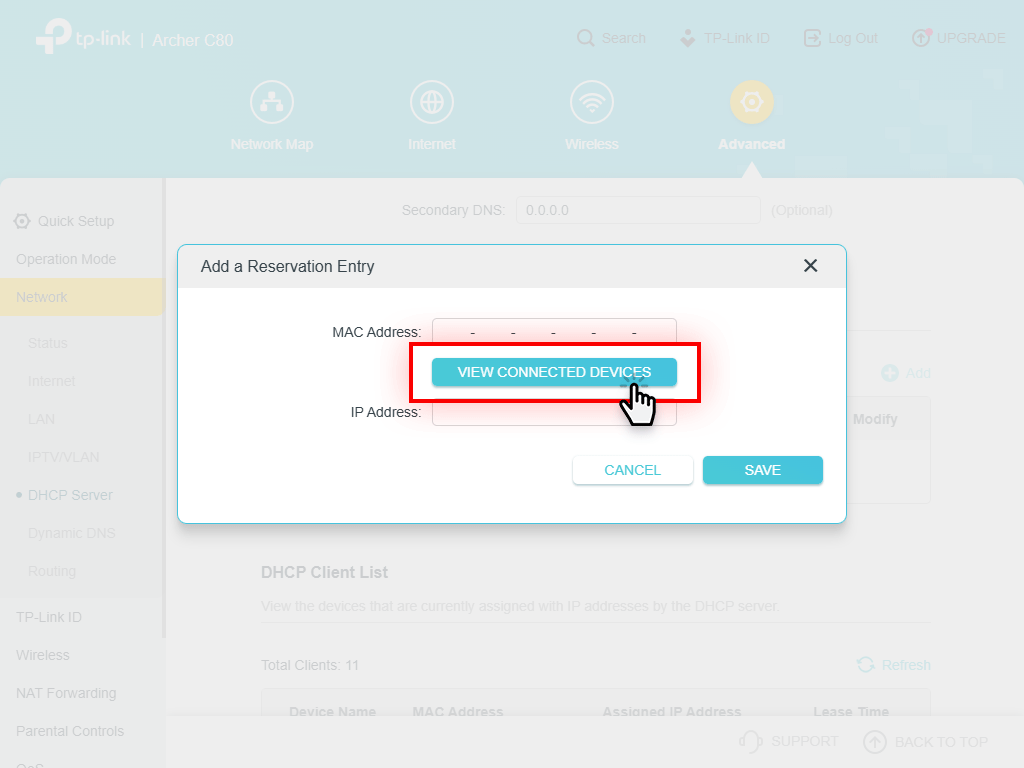
To prevent the router from changing the IP address with each connection, you can assign a permanent static address to the scanner.
The procedure is shown using the TP-Link Archer C80 router as an example.
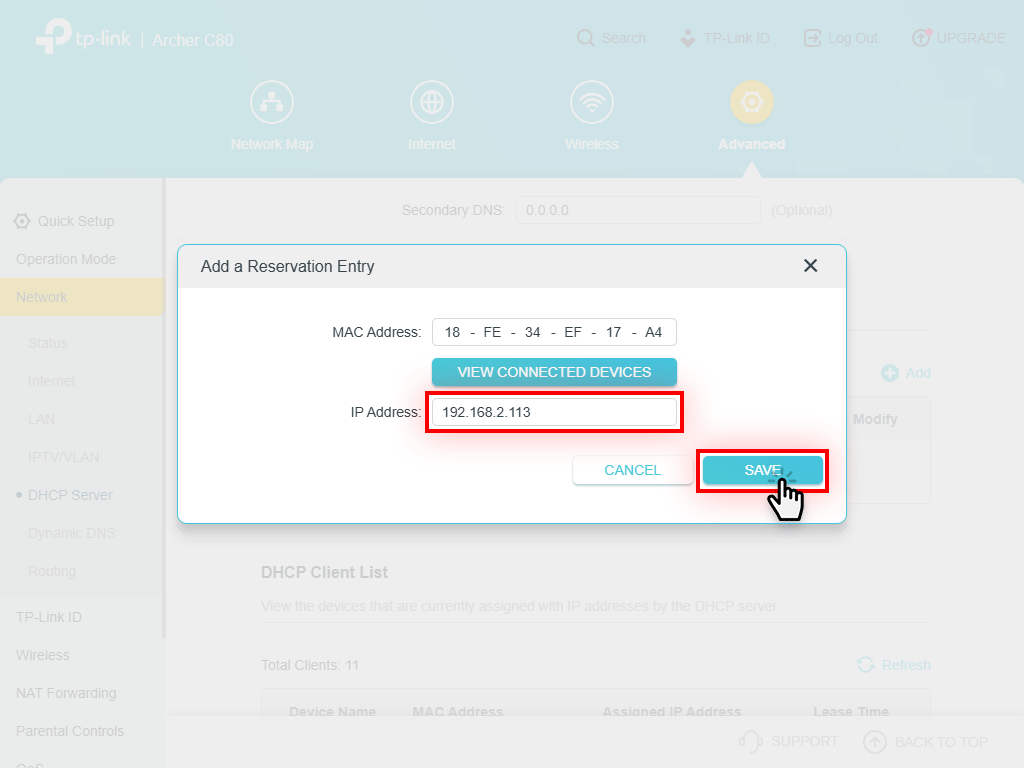
Now the scanner will have a permanent static IP address.
In most cases, to work with the ScanDoc scanner, the default WLAN settings are sufficient, however, WLAN signal may be lost or the connection speed may be slow.
Symptoms by which you can determine that WLAN connection disappears due to congestion in channels:
A common problem is that the scanner uses a WLAN network of the same channel that is used by other devices nearby. A universal solution: change the channel on which the scanner works (most often, users leave the Auto value, which is set in the default settings).
If you have an Android phone or tablet, download the free WLAN Analyzer app from the Google Play.
Launch the application, in the main window of the program you will see a graph on which wireless networks with reception levels and channels on which they work will be displayed.
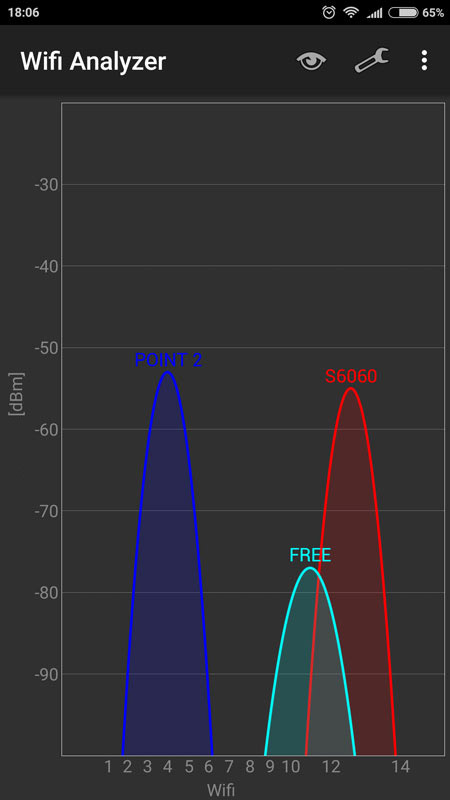
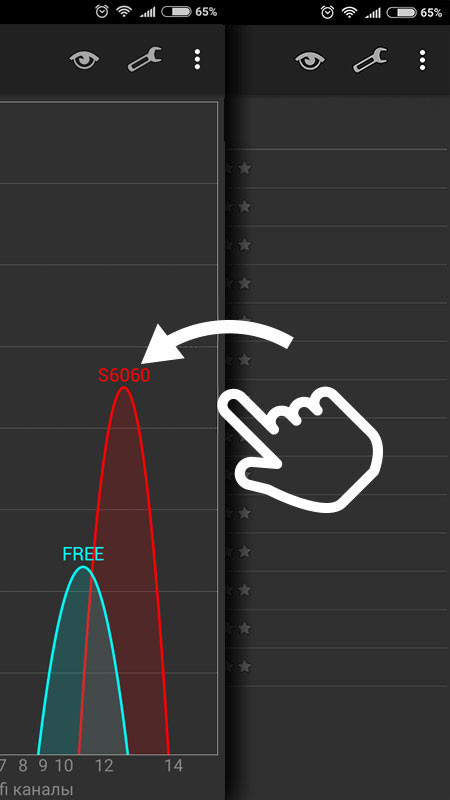
In the example, you can see that the QUANTEX network (channel 13) intersects with another FREE network (channel 11). However, there are free channels on the left side and in the middle of the range.
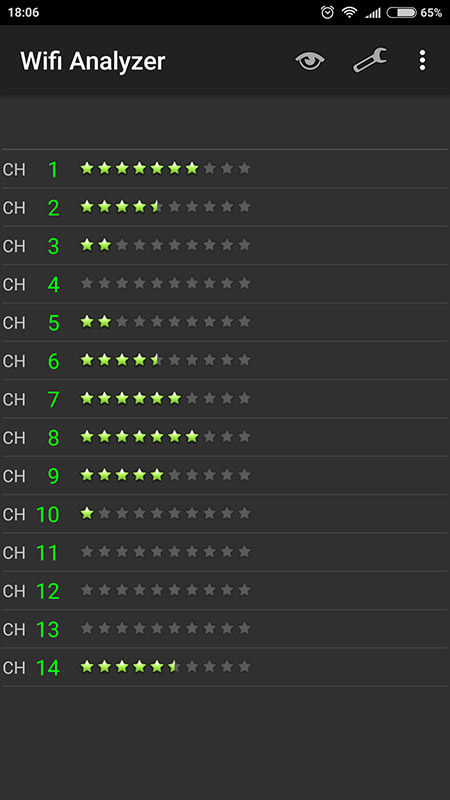
Scrolling to the left of the program screen you can see the "rating" of channels (the more stars, the freer the channel).
In our example, the 1st or 8th channels turned out to be free (on these channels the scanner will work faster and without failures).
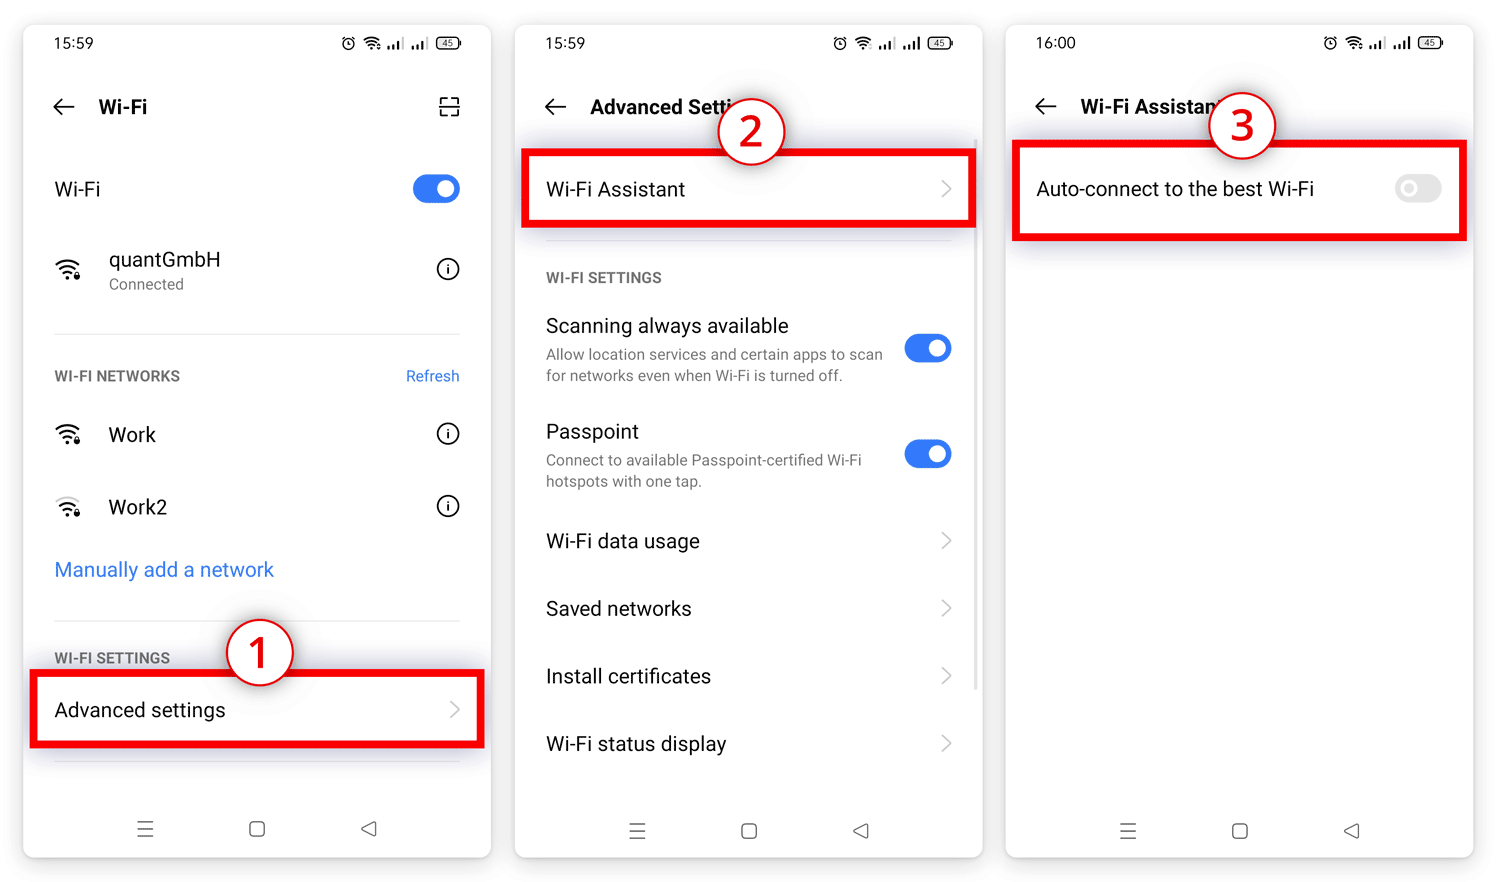
Many smartphones have automatic selection of the best network enabled by default. In different versions of Android and in different assemblies, it is called differently, but most often it is called "WLAN Assistant".
If the connection quality is poor, WLAN Assistant switches your device to other available WLAN networks.
For example, you have a WLAN network with Internet access. When connected to the ScanDoc scanner network, the smartphone does not have Internet access and the WLAN assistant automatically switches to another network that has Internet access. In this case, you will see a message in the ScanDoc program: "No communication with scanner"
You can turn off the WLAN assistant in the WLAN networks settings on your smartphone.
In different builds of Android, the WLAN assistant may be called differently and located in different menu items. Below we have presented some options for finding it in popular Android shells.

If you have a stable WLAN connection to the ScanDoc scanner, but the program still shows the message "No connection with the scanner", turn off the mobile Internet so that only the WLAN network remains on from all networks.


